WOLF REHABILITATOR (“WOLF ELIMINATOR”) AND MAGNET RESONATOR INSTRUCTIONS
After years of research and many hours of work on lathes and CNC machines, Saddle Rider Music introduces our new “Cello Wolf Rehabilitator Set” which includes an array of wolf-taming tools in a boxed set. If you have already purchased the set, please read the instructions below. Purchasers of our new “Double Bass Magnet Resonator” can refer to the cello magnet instructions. With the exception of the double bass magnets being reversible for different grip strengths, the information is the same. FOR SAFETY CONSIDERATIONS AND TO AVOID DAMAGING YOUR INSTRUMENT, PLEASE READ ALL OF THE INSTRUCTIONS BEFORE USING THESE DEVICES.
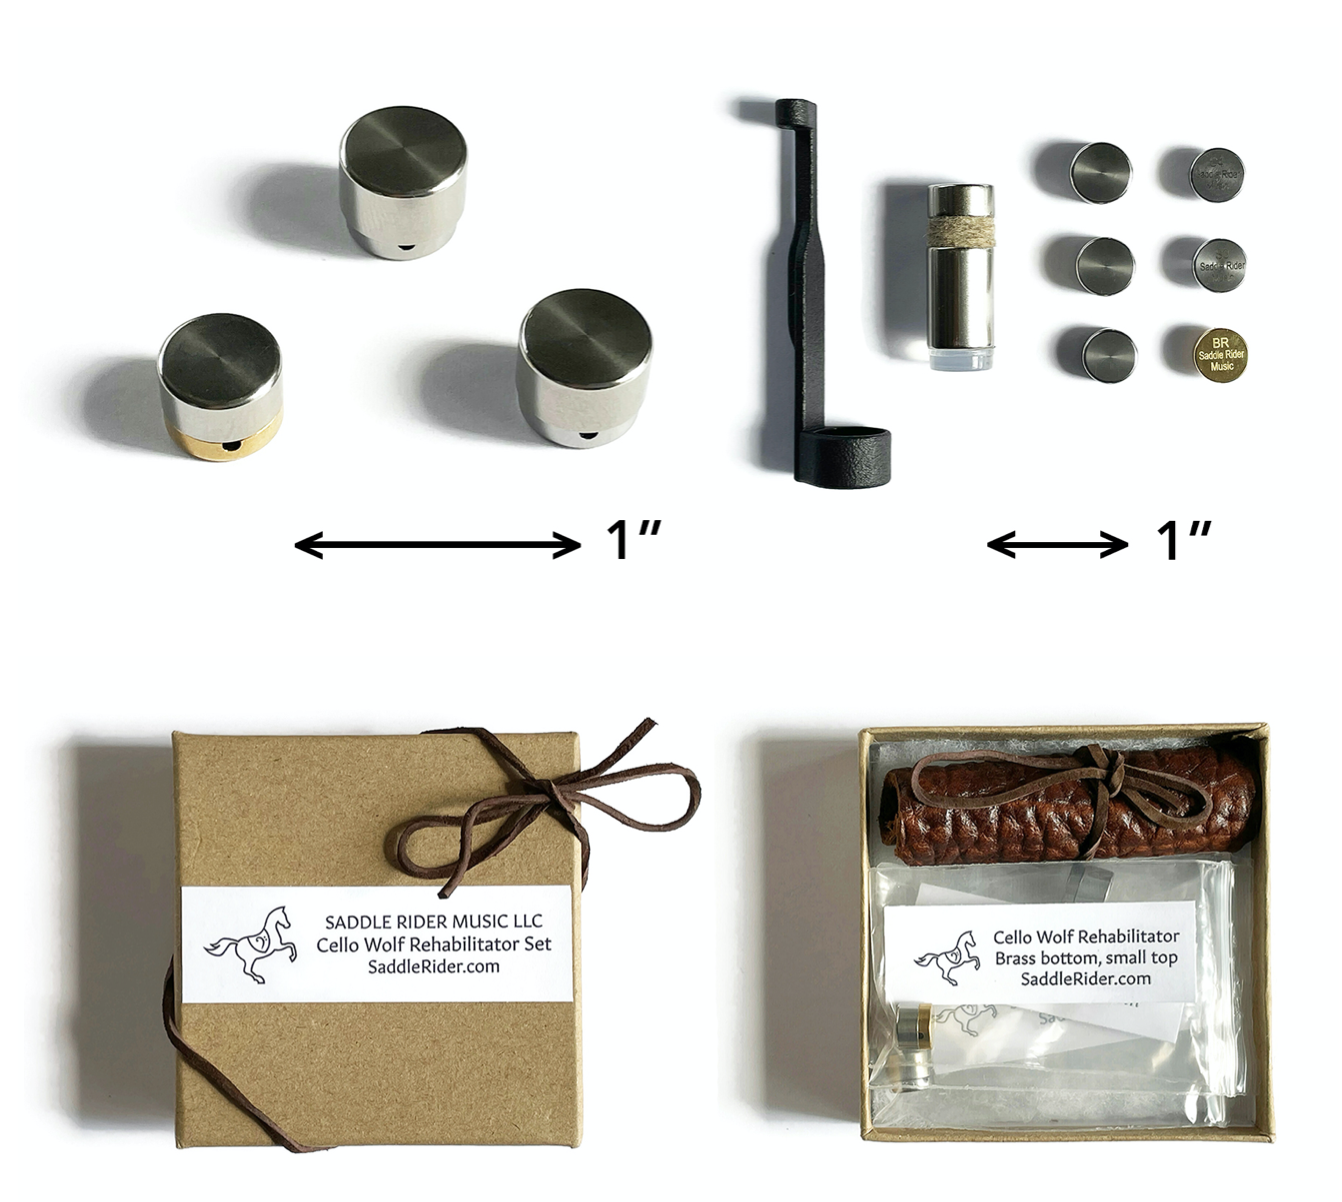
UPPER LEFT: Close up photo of three weighted “button” clamp combinations. Their patent pending design features fully interchangeable tops and bottoms, allowing incremental weights ranging from 4.7 to 7.3 grams. By balancing most of the weight towards to top of the string, these clamps control wolf tones more effectively than traditional “wolf eliminators.” The brass and two different types of stainless steel bottoms offer three choices for each of the three sizes of top (nine combinations in total). Attaching the buttons to the G or C string allow many frequency options to control wolf tones and manage an instrument’s tone and response.
UPPER RIGHT: Complete contents of the set. The set contains a patent pending safe installer for magnet-style wolf tone resonators, a magnetic wolf tone resonator with high quality wool pads, carefully selected for tone, 3 surgical stainless steel button tops with incremented weights, 3 button bottoms (bell brass, surgical stainless steel, knife-blade stainless steel — each with a different hardness to vary response and sound as desired)
INSTRUCTIONS FOR USE:
After removing the magnets from their leather cover, get to know them in a safe space, away from your cello and breakable objects to get a feeling for how they work. When you feel comfortable with them, you can optionally remove the clear rubber shipping bumper — the installation spoon works better without that.
CAUTION! When holding the upper and lower magnets close to one another, every fraction of an inch increases the force of attraction, so hold the two parts FIRMLY, and keep them 12 or more inches away from each other when not attached, felt-to-felt. The back ends (without felt) can knock together hard if not held firmly. If you do accidentally connect the back ends, the attraction is very strong — you will need to pry them apart sideways.
To install: Put the cello on its back on a table or sofa, and insert the large magnet into the installation spoon, felt side up. Insert the spoon and magnet into the C-string side F-hole, and turn until the felt can be pressed securely against the inside of the top of the cello. With the interior felt placed securely against the inside of the cello, use your other hand (12 inches or more away from the interior magnet!) to place the small magnet, felt down, onto the top of the cello. While holding it securely, slide it until the two magnets hold fast to each other, through the top of the cello. Position the magnets as desired for sound and wolf control. For sound adjusting tips, check out YouTube. There are many videos about positioning magnetic wolf suppressors.
CAUTION! If using a magnetic resonator with an old cello or any instrument that may have repaired cracks with cleats on the inside of the top, be sure to consult with a luthier before installing the magnets. Bumping the magnet into cleats can disengage the bottom from the top (see #5 below for reattaching the magnets) or cause other issues.
In the unlikely event that the interior magnet does lose connection with the exterior one, turn the cello so that the interior magnet is resting against the inside of the instrument’s top. Holding the magnet top securely, gently place its felt side on the instrument’s top and slide it towards the interior magnet. The interior magnet will then flip into the correct position.
TO REMOVE THE MAGNETIC RESONATOR: Place the cello on its back, as in step 3, and slide the exterior magnet until the edge is against the F-hole. Insert the installation tool and cup the interior magnet with it. While holding both the tool and the outer magnet securely, one in each hand, slide the outer magnet 12 inches or more away from the inner magnet and remove it from the surface of the cello. Then remove the interior magnet from the F-hole using the installation tool.
BUTTON CLAMP INSTRUCTIONS:
Using button clamps to rehabilitate wolf tones, or to make other sound and response adjustments, is an art as much as a science. A good starting point is to try one of the three clamps below the bridge on the G string at a point where plucking the string afterlength sounds at the same pitch (albeit in a higher octave) than the wolf tone. An alternative approach is to start with a clamp as low as possible, right next to the string winding, and move it towards the bridge in small increments until you get the sound and response you prefer. Move the clamps around, try different top and bottom combinations, and see what works best! After getting the hang of it, the process takes seconds and requires very little thought. Experience will allow you to pick the right button combination just like a golfer grabs a sand wedge or a 5-iron depending on the task at hand.