NEW Cello Wolf Rehab 2023-24

Open Source Magnetic Cello Wolf Rehabilitator (ver. 2023-24)

Overview
Introducing the Saddle Rider Research Collective’s new 2023-24 wolf rehabilitator designed just in time for the November 15-18, 2023 VSA (Violin Society of America) Convention in Baltimore! This document details plans, specifications, assembly instructions, as well as links to the 3D-printable files for the coupled oscillating chamber and Saddle Rider’s trademark open-source “Safe Installation Tool.” Released with a Creative Commons “CC-BY” license, our designs for both the safe installer and resonating chamber are free for public use, both private and commercial, with attribution to SaddleRider.com and the Saddle Rider Research Collective. We hope you will make it, use it, and subscribe to our blog to stay updated about the latest developments in stringed instrument technology! In the coming pages, along with device specifications, we describe how this design is similar to the popular Krentz “Modulator,” how it is different, and why you should care.
DIY Kit Assembly and Adjustment Instructions

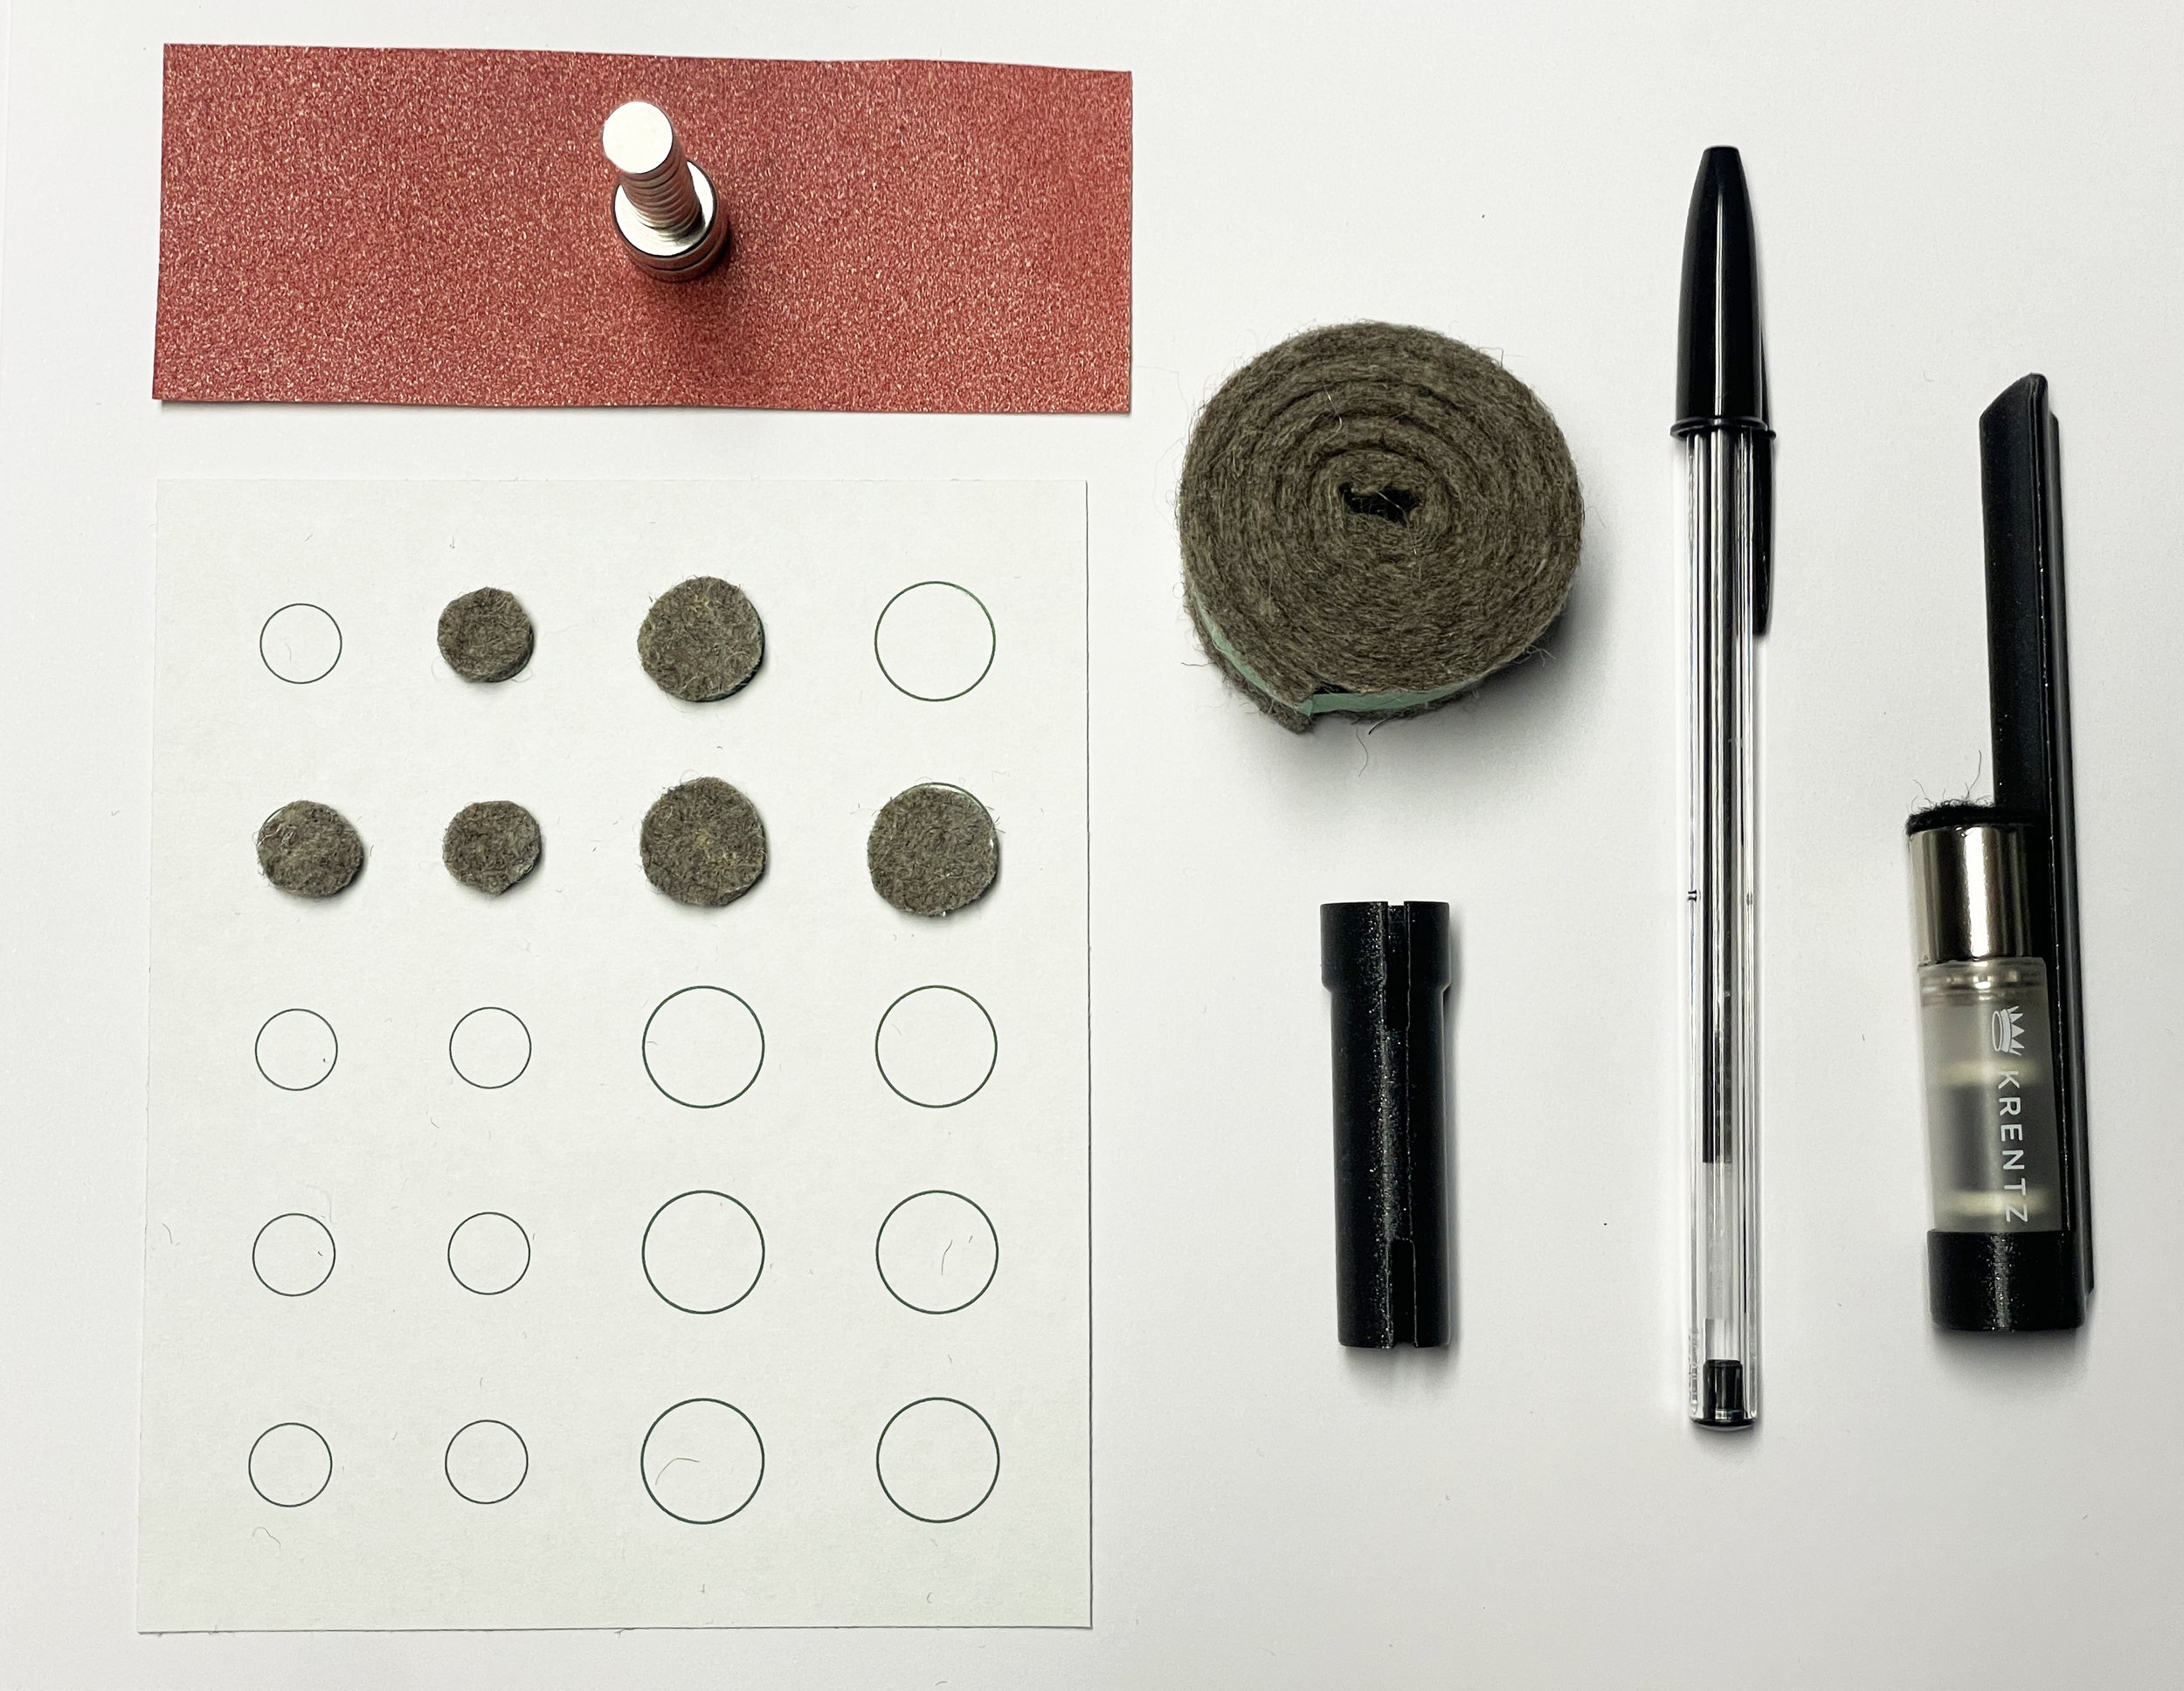
Parts List (counterclockwise from top left):
1. Small piece of fine grit sandpaper
2. Neodymium magnets in assorted diameters
3. Saddle Rider felt pad template printed on adhesive label paper
4. Saddle Rider 3D-printed open-source resonating chamber
5. Ball-point pen (“BIC” style – used as an assembly and disassembly tool)
6. Saddle Rider’s open-source magnet safe installation and removal tool
7. The Krentz modulator shown here is for scale – it is not part of the kit
8. A small length of thick and durable wool felt (see instructions)
9. Additional items not shown: Sharp scissors for cutting felt, 5-minute epoxy for gluing felt to magnets, Q-tip for mixing epoxy and applying to felt circles, thread or dental floss for suspending magnet array to determine polarity, metal object such as a music stand for clamping magnets to felt while the glue dries, optional fingernail polish for painting the external magnet.
SAFETY TIPS: High quality N52 grade Neodymium magnets are STRONG! Keep them away from children and pets. Handle them firmly and with caution. Letting one go near a metal object can cause it to fly out of your hand with great force. Once they’re safely assembled into a wolf eliminator as described below, they are much more manageable, but still should be handled carefully. Keep them clear of pacemakers or anything else that could be damaged by strong magnetic fields.
When separating them from each other, it is often easiest to press them off a stack sideways, one at a time, like a PEZ dispenser.
ALSO NOTE: It’s tempting to buy magnets from Amazon (speaking from experience), but those magnets are usually N35 grade and significantly weaker than McMaster’s N52 grade magnets. They may work with these plans, but won’t work as well.
Background
Any of my students or YouTube subscribers can tell you that I have never been a fan of Neodymium magnet-based wolf eliminators. In my experience, if you clamp a pair of these powerful magnets to a string below the bridge, the magnetic field will mute the surrounding strings. Clamped to the body of an instrument, heavy magnet “modulators” can increase the weight of a cello’s top by 8 percent of more – an insult to the artistry of luthiers who painstakingly graduate the top to fractions of millimeters to achieve the best possible tone and performance. Analogous to dumping salt and pepper on Lobster Thermidor at a fine restaurant, this added mass can’t help but change the sound of an instrument, in my experience usually for the worse.
So why am I recommending a new design for magnet coupled-oscillating wolf eliminators? Last month at Cornell I hosted the terrific cellist Camden Shaw for a masterclass during a visit by the Dover String Quartet. Here is Camden (below left) with my students Hazel Rivera-Rosario and Andrew Wallace, who is holding Camden’s cello. If you zoom in, you can see a 35-gram Krentz Modulator perched in the “disengaged” position on the cello’s lower C bout.

Puzzled, I asked Camden why he kept such a heavy wolf eliminator on his cello in a position where it wasn’t doing anything? His answer: It is essentially a security blanket! He doesn’t generally engage it during performances because it mutes the cello, but sometimes he likes to use it for recordings. Then, on another occasion, I was speaking with my old friend Joel Dallow (cellist with the Atlanta Symphony and host of the “Cello Sherpa” podcast) who also uses a Krentz on his lively but extremely wolfy old English cello. Like Camden and Joel, there are many other professional cellists for whom heavy magnet wolf eliminators seem to be the best solution for their instruments. Over the last month, because of these and other conversations, Saddle Rider has embarked on another deep dive into magnet resonators to see if we could make improvements to existing designs. Here are the results of our efforts!
How is this new design similar to a Krentz Modulator? How is it different?
Like a Krentz Modulator, our most recent design contains an oscillating piston in a cylindrical chamber suspended in reverse polarity between two neodymium magnets. Unlike the Krentz, Saddle Rider’s modular design can be modified by the user to change the weight of both the body of the device and the piston, minimizing the overall weight and tailoring it to each instrument’s needs. In addition, the Saddle Rider chamber incorporates air vents in the oscillating chamber to allow the piston (when it is in free floating mode) to oscillate with less resistance. We find that, for many instruments, felt padding is a less muting anchor for coupled oscillation (the mechanism that neutralizes wolf tones) than magnetic suspension. With the Saddle Rider design, players can easily compare felt anchoring with reverse polarity by switching the orientation of the piston inside the resonating chamber – i.e., pointing the north magnetic pole up or down in the chamber. By default, the Saddle Rider wolf rehabilitator averages approximately 20 grams with a 10+ gram adjustment range, as compared to the unchangeable 35 grams weight of a Krentz Modulator. By offering cellists control over a wide range of weight and balance options, we hope to achieve the benefits of going right to the source of wolf tones on the body of an instrument, while minimizing the tonal filtering and muting of currently available magnetic wolf eliminators.
What is a “wolf tone?”
All stringed instruments are complex assemblies of mechanically “coupled oscillators” with vibrating parts that affect each other. If you’re a math wonk, you may enjoy this MIT lecture about coupled oscillators. Or, even if the math is over your head, skim through to the mechanical demonstrations which are entertaining and informative!
Cello “wolf tones” are mechanically induced disturbances caused by the coupled oscillation of the bridge and string with an extremely resonant node on the body of the instrument. Frequency resonances (usually excited between e-flat and f-sharp) excite an area on the top of a cello (usually centered at a point just below the instrument’s C-side f-hole), making it oscillate so widely that it interferes with the normal Helmholtz action of the bowed string. The string repeatedly kicks back to zero and starts again in an uncontrolled way. From a player’s perspective, a wolf tone can sound like gargling, a panicked sheep, or worse. There is no relationship between the quality of a cello and the severity of a wolf tone, and wolf tones come and go on the same instrument as mysteriously as the weather. That is why a wolf control method that can be easily engaged and disengaged, and preferably adjusted over a range of needs, is essential for any professional or amateur player’s toolkit.
How do I make this new wolf eliminator, and where do I get the parts I need?
STEP 1, MATERIALS NEEDED:
Purchase the following magnets and felt strips from McMaster-Carr:
7/16 inch diameter by ¼ inch thickness Neodymium disc magnets (Quantity 2 or more)
5/16 inch diameter by 1/8 inch thickness Neodymium disc magnets (Quantity 5 or more)
1” x 1/8” Wool Felt Strip -- Durometer 25A or Durometer 20A (these have different firmness, both will work. I have a slight preference for the less firm 20A felt in most cases — it will compress more and result in a firmer magnetic hold on the top of an instrument. The 25A works better for some wolves, and with the alternative 1/2 inch diameter magnet options.)
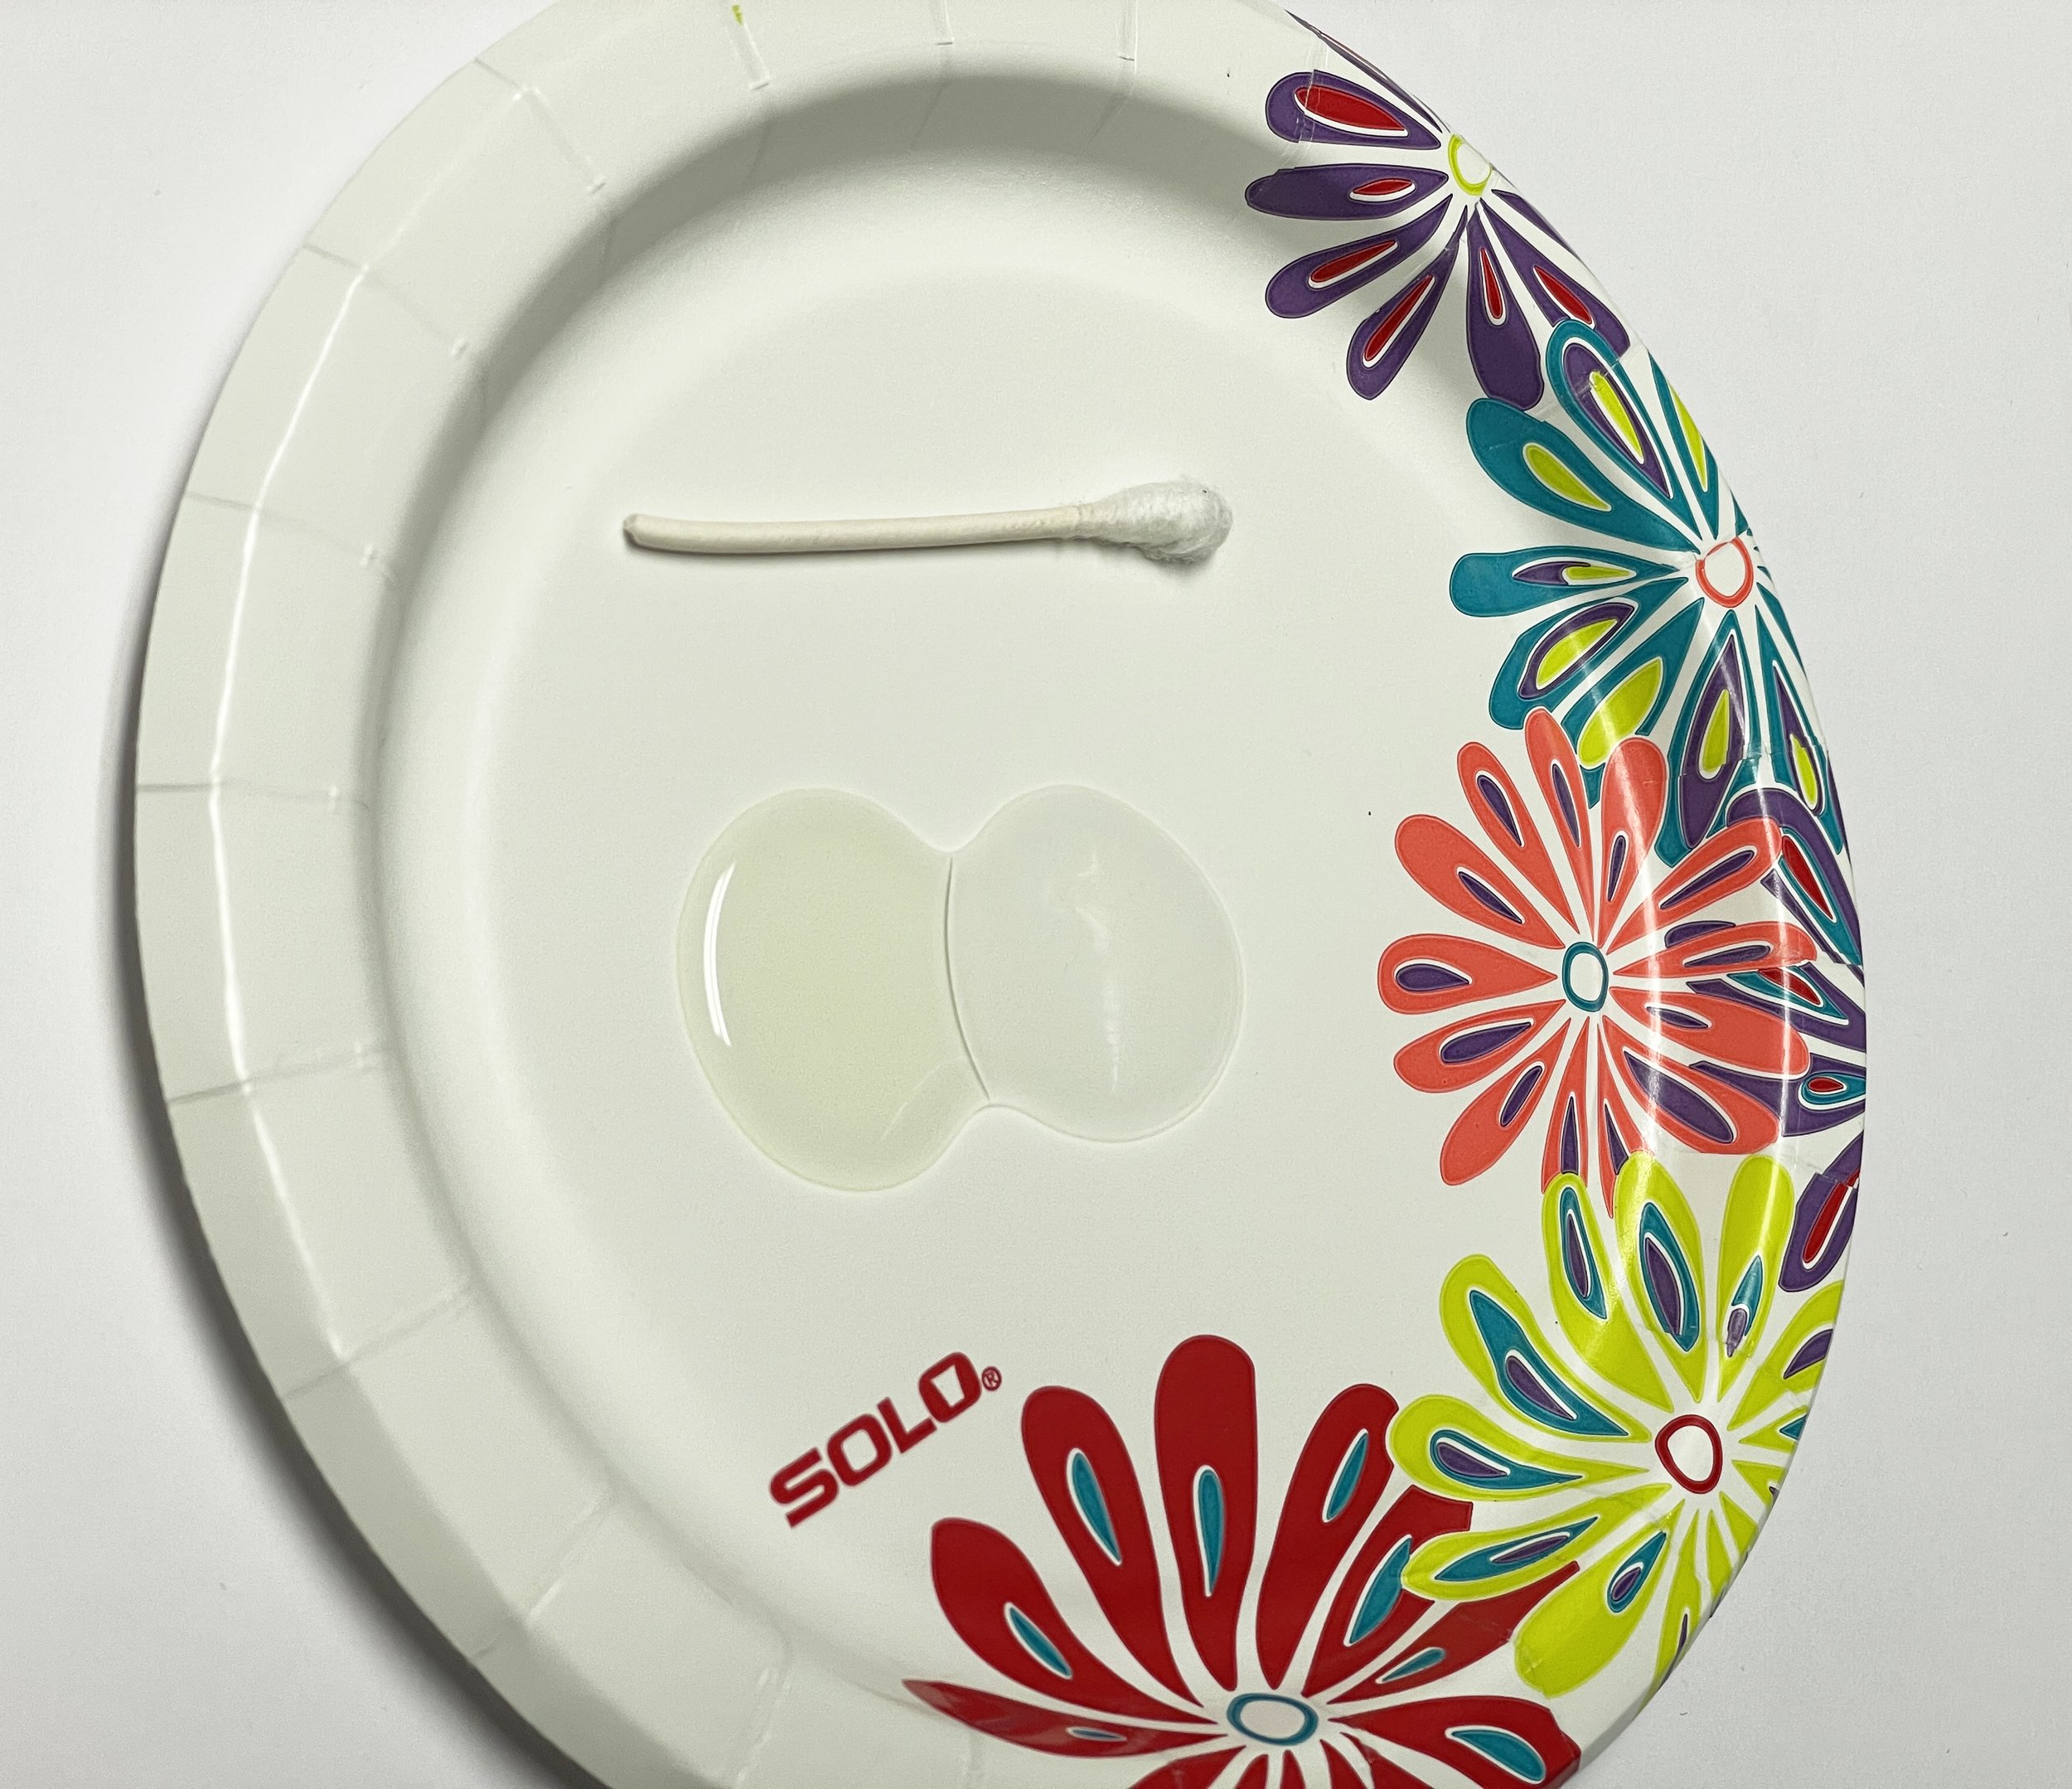
Also obtain a small piece of medium or fine sandpaper, sharp scissors, 12-inch length of thread or dental floss, small amount of 5-minute epoxy glue, a couple of Q-tips, a small paper plate of jar lid for mixing glue, and a metal object on which to place padded magnets to clamp while the glue dries. Painting the external magnet with fingernail base coat and polish is an attractive option.
You will need to 3D print the oscillating chamber and safe installation tool. The 3D printable files and the Felt Pad Template PDF are available for download by clicking here: Remember to print the PDF Template “at scale.”
If you don’t have access to McMaster-Carr or a 3D printer, for a nominal donation to the Saddle Rider Research Collective, we will send a kit containing all the parts you need to make these wolf eliminators. Please contact us at SaddleRiderLLC@gmail.com for more information.
Neodymium Magnets 101: These magnets, also called “rare earth magnets” are available in different grades, typically ranging from “N35” to “N52,” with N52 being the strongest. You can purchase magnets from many sources, but the ones available on Amazon.com or local convenience stores are usually lower grade than the ones sold by McMaster-Carr. If you find a magnet source where the magnets cost $.15 to .30 each, chances are that they are N35 grade. Wonderful for refrigerator magnets, perhaps, but not so great for wolf eliminators. The ones McMaster-Carr sells typically cost a buck each or more and are worth the price. If you live in a country where only metric neodymium magnets are available, check the “alternative sizes” link in the download folder linked above.
STEPS 2-9, ASSEMBLY:
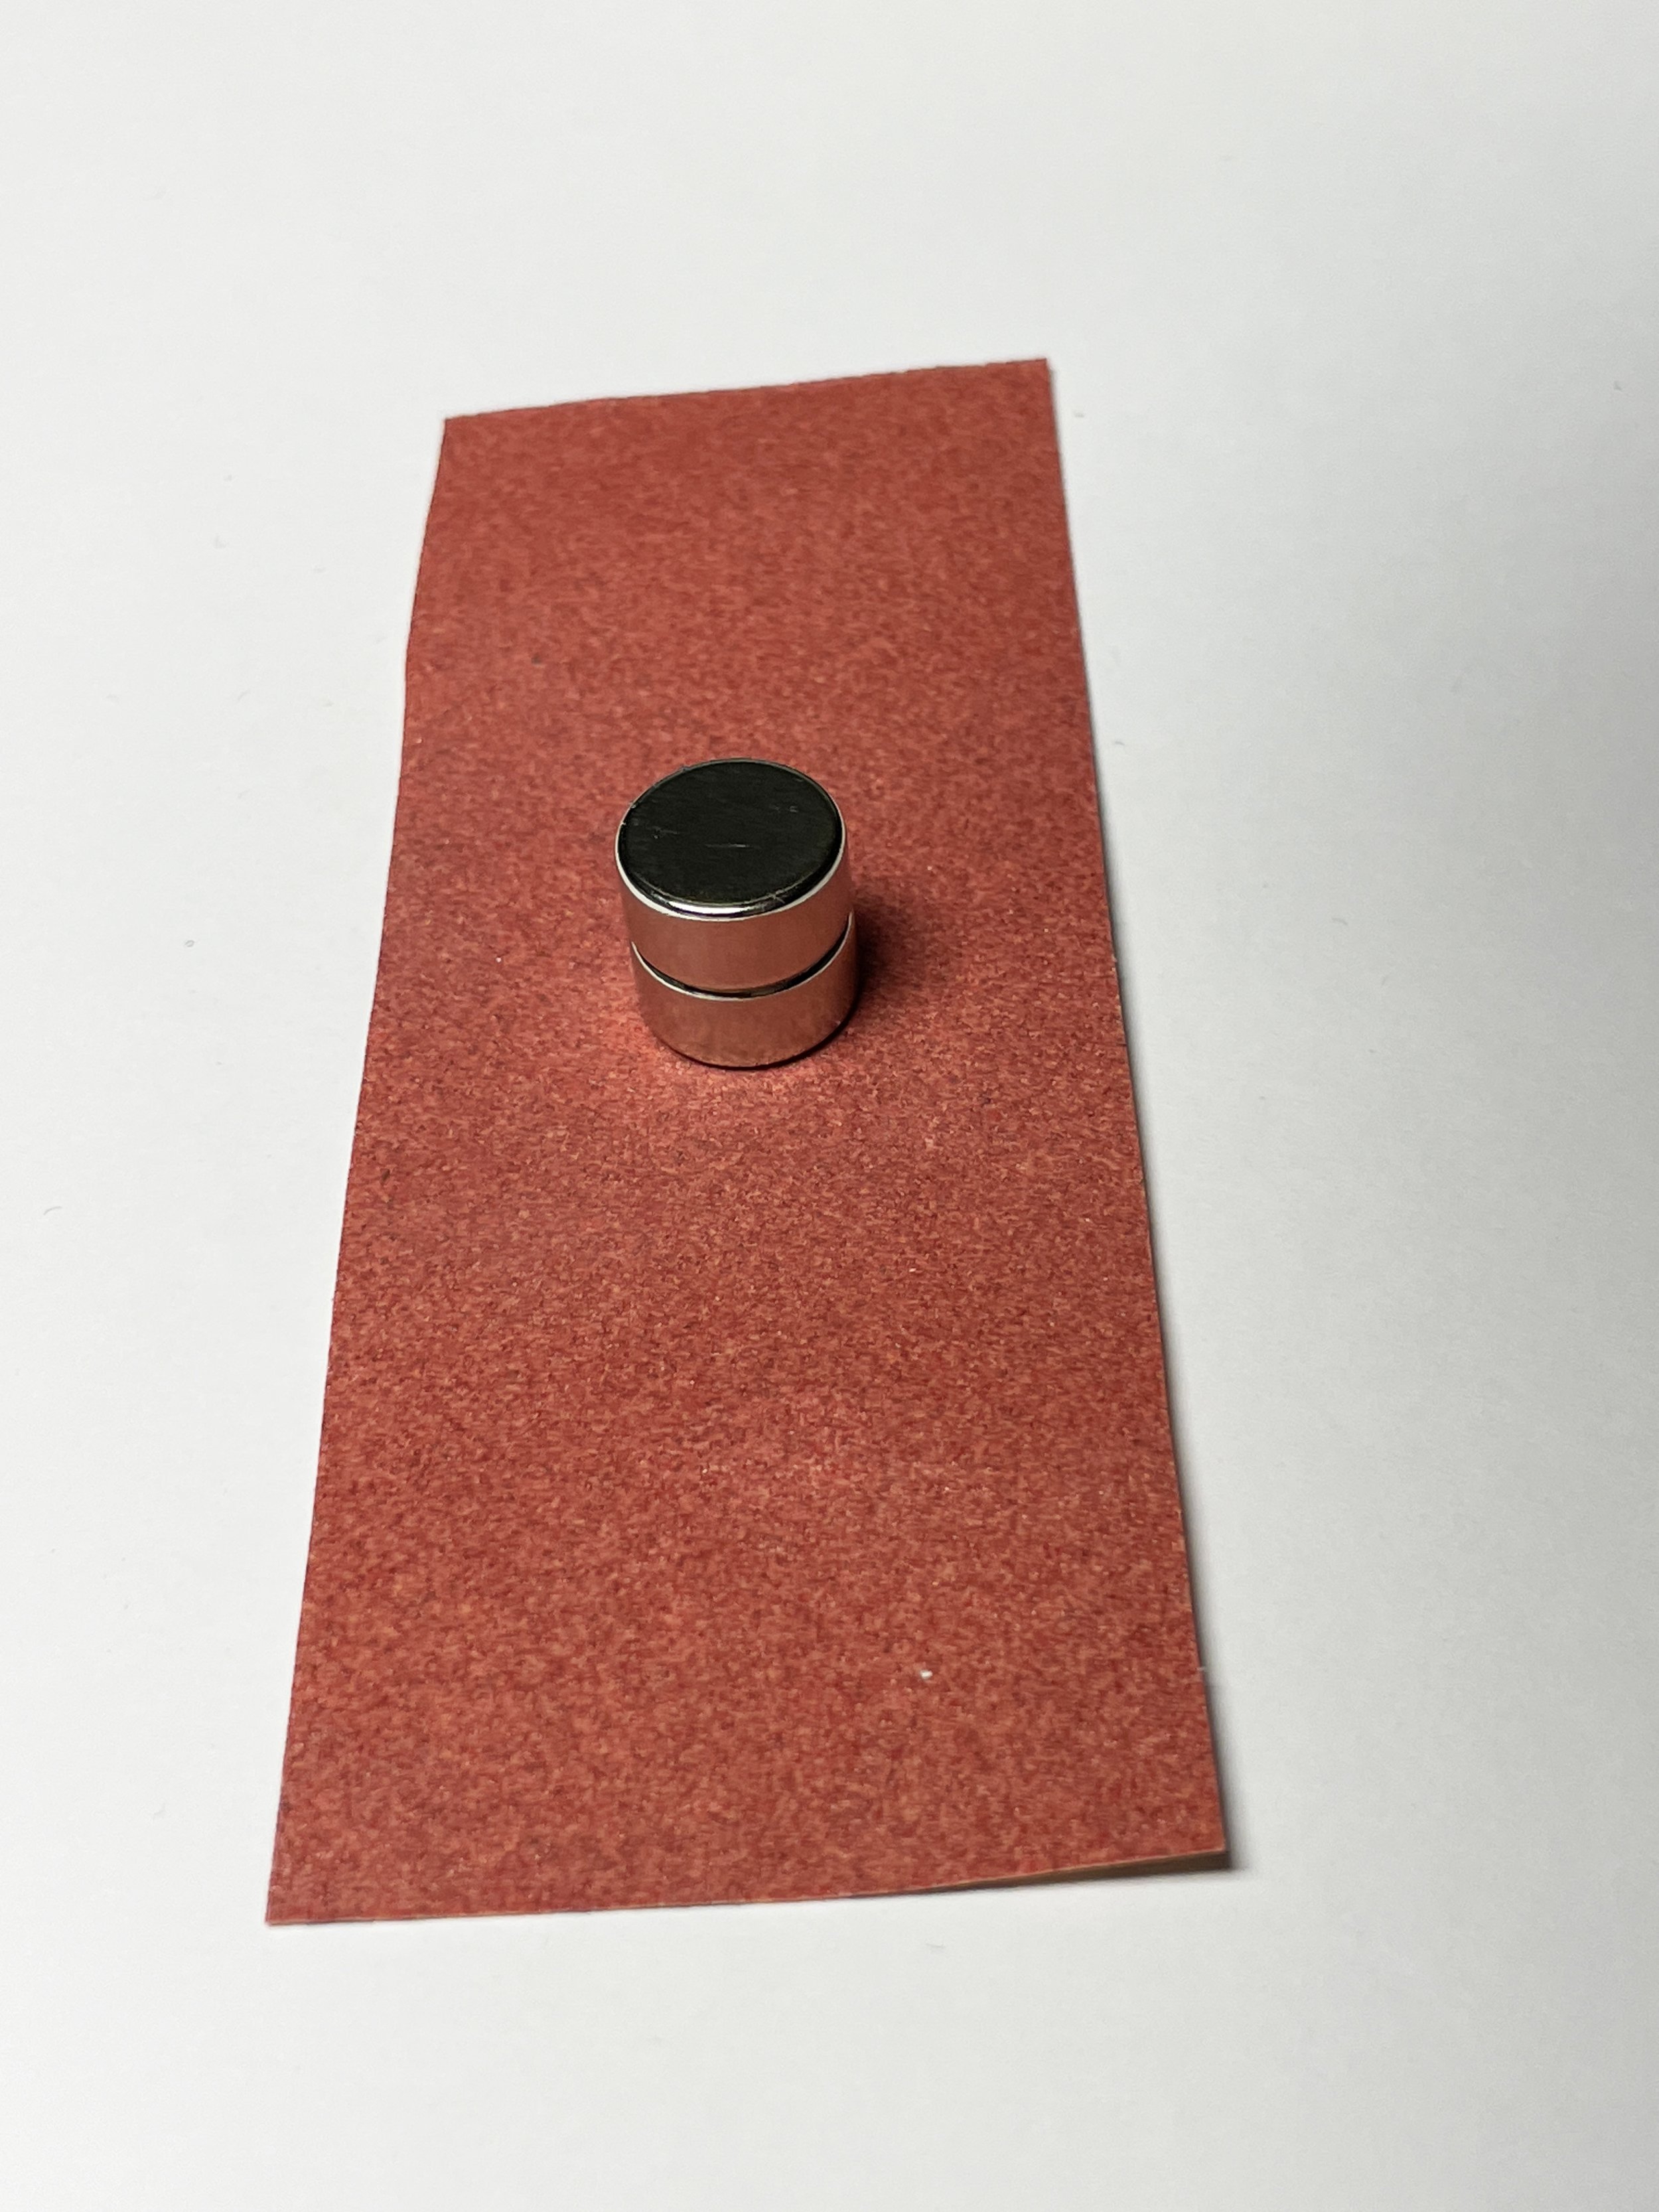
STEP 2: Group 7/16th inch magnets (minimum quantity 2) and 5/16th inch magnets (minimum quantity 5) into separate stacks. Hold them firmly, and don’t let them slam hard together, as they can chip or crack. Lightly abrade the outer sides of the outer magnets of each stack with the sandpaper. This allows the epoxy to adhere better to the magnet.
STEP 3: Print the Felt Pad Template PDF on adhesive label paper, such as the Avery brand paper carried by Staples Office Supply stores. (Remember to print it “at scale.”) Cut the template into one-inch strips and apply it firmly to the felt strip. Cut a length that is easy to manage and cut the circles with sharp scissors. You will need two pads for each magnet size.
STEP 3A: For safe keeping, separate each of the magnet stacks into 2 parts, and place the 4 stacks abraded side down on a metal object. This is so the orientation will be correct when you pry them off to place them on the upward-facing glue-side of the pads. These magnets are HARD to pry apart. You may need to place the stack sideways on the edge of a table and push down on the outer magnet to pry it loose.
STEP 4: Mix the epoxy according to the manufacturer’s instructions. Apply a thin coat to one side of each pad, and place the pads glue side up on a metal object beside the corresponding magnet. One-by-one, carefully place the abraded magnets down on the pads, holding firmly so they don’t snap out of your hand. Center the magnets on the pads – if cut correctly, each pad will be slightly bigger than the corresponding magnet. Check and recenter the magnets over the first few minutes before the glue gets tacky, then leave them undisturbed for an hour. In an hour, they’ll be 80-90 percent cured, and you can gently remove them from the metal object to work with them.
STEP 5: Suspend the 5/16th inch magnet array from a piece of thread or dental floss and mark the side that points north. (For consistency, it’s a good practice to point the polarity of the wolf eliminator so that North is top and South is bottom.) The principle that opposite poles attract and similar poles repel each other will be used to assemble the device.
STEP 6: Drop a 5/16th inch magnet into the chamber and hold the North side of the magnet array against the bottom of the chamber. This will flip the South side of the internal magnet down into the correct position.
STEP 7: Use the handle of the pen to press the internal magnet into place.
STEP 8: Drop the magnet array into the chamber with the North side facing DOWN. This will reverse the polarity and cause it to float in a reverse magnetic field. You will need to hold it in with your finger because the magnetism will make it pop back out. Keeping the chamber capped with your finger, shake it. The array should move a little when you shake it. If it doesn’t, you may have cut the pads a little too large and they need trimming. On the other hand, if the array is very loose and rattling, the pads may be too small and the magnet is rattling against the edge of the chamber. In that case, the device will work, but you may hear buzzing when you hit wolf tones. It is a good idea to cut another pad and re-glue.
STEP 9: Locate the 7/16th inch magnet that has the South pole exposed. Press that into the chamber and clip it into place. It serves as a cap to the resonating chamber. It is good practice to cut a thin strip of painters’ tape or some other easily removable, non-stretching tape to secure the chamber opening tightly against the capping magnet so it doesn’t stretch and become loose over time. After the adjustment phase, you can glue in the capping magnet, or just leave the tape in place for future adjustments.
STEPS 10-12, Final Installation and Adjustment:
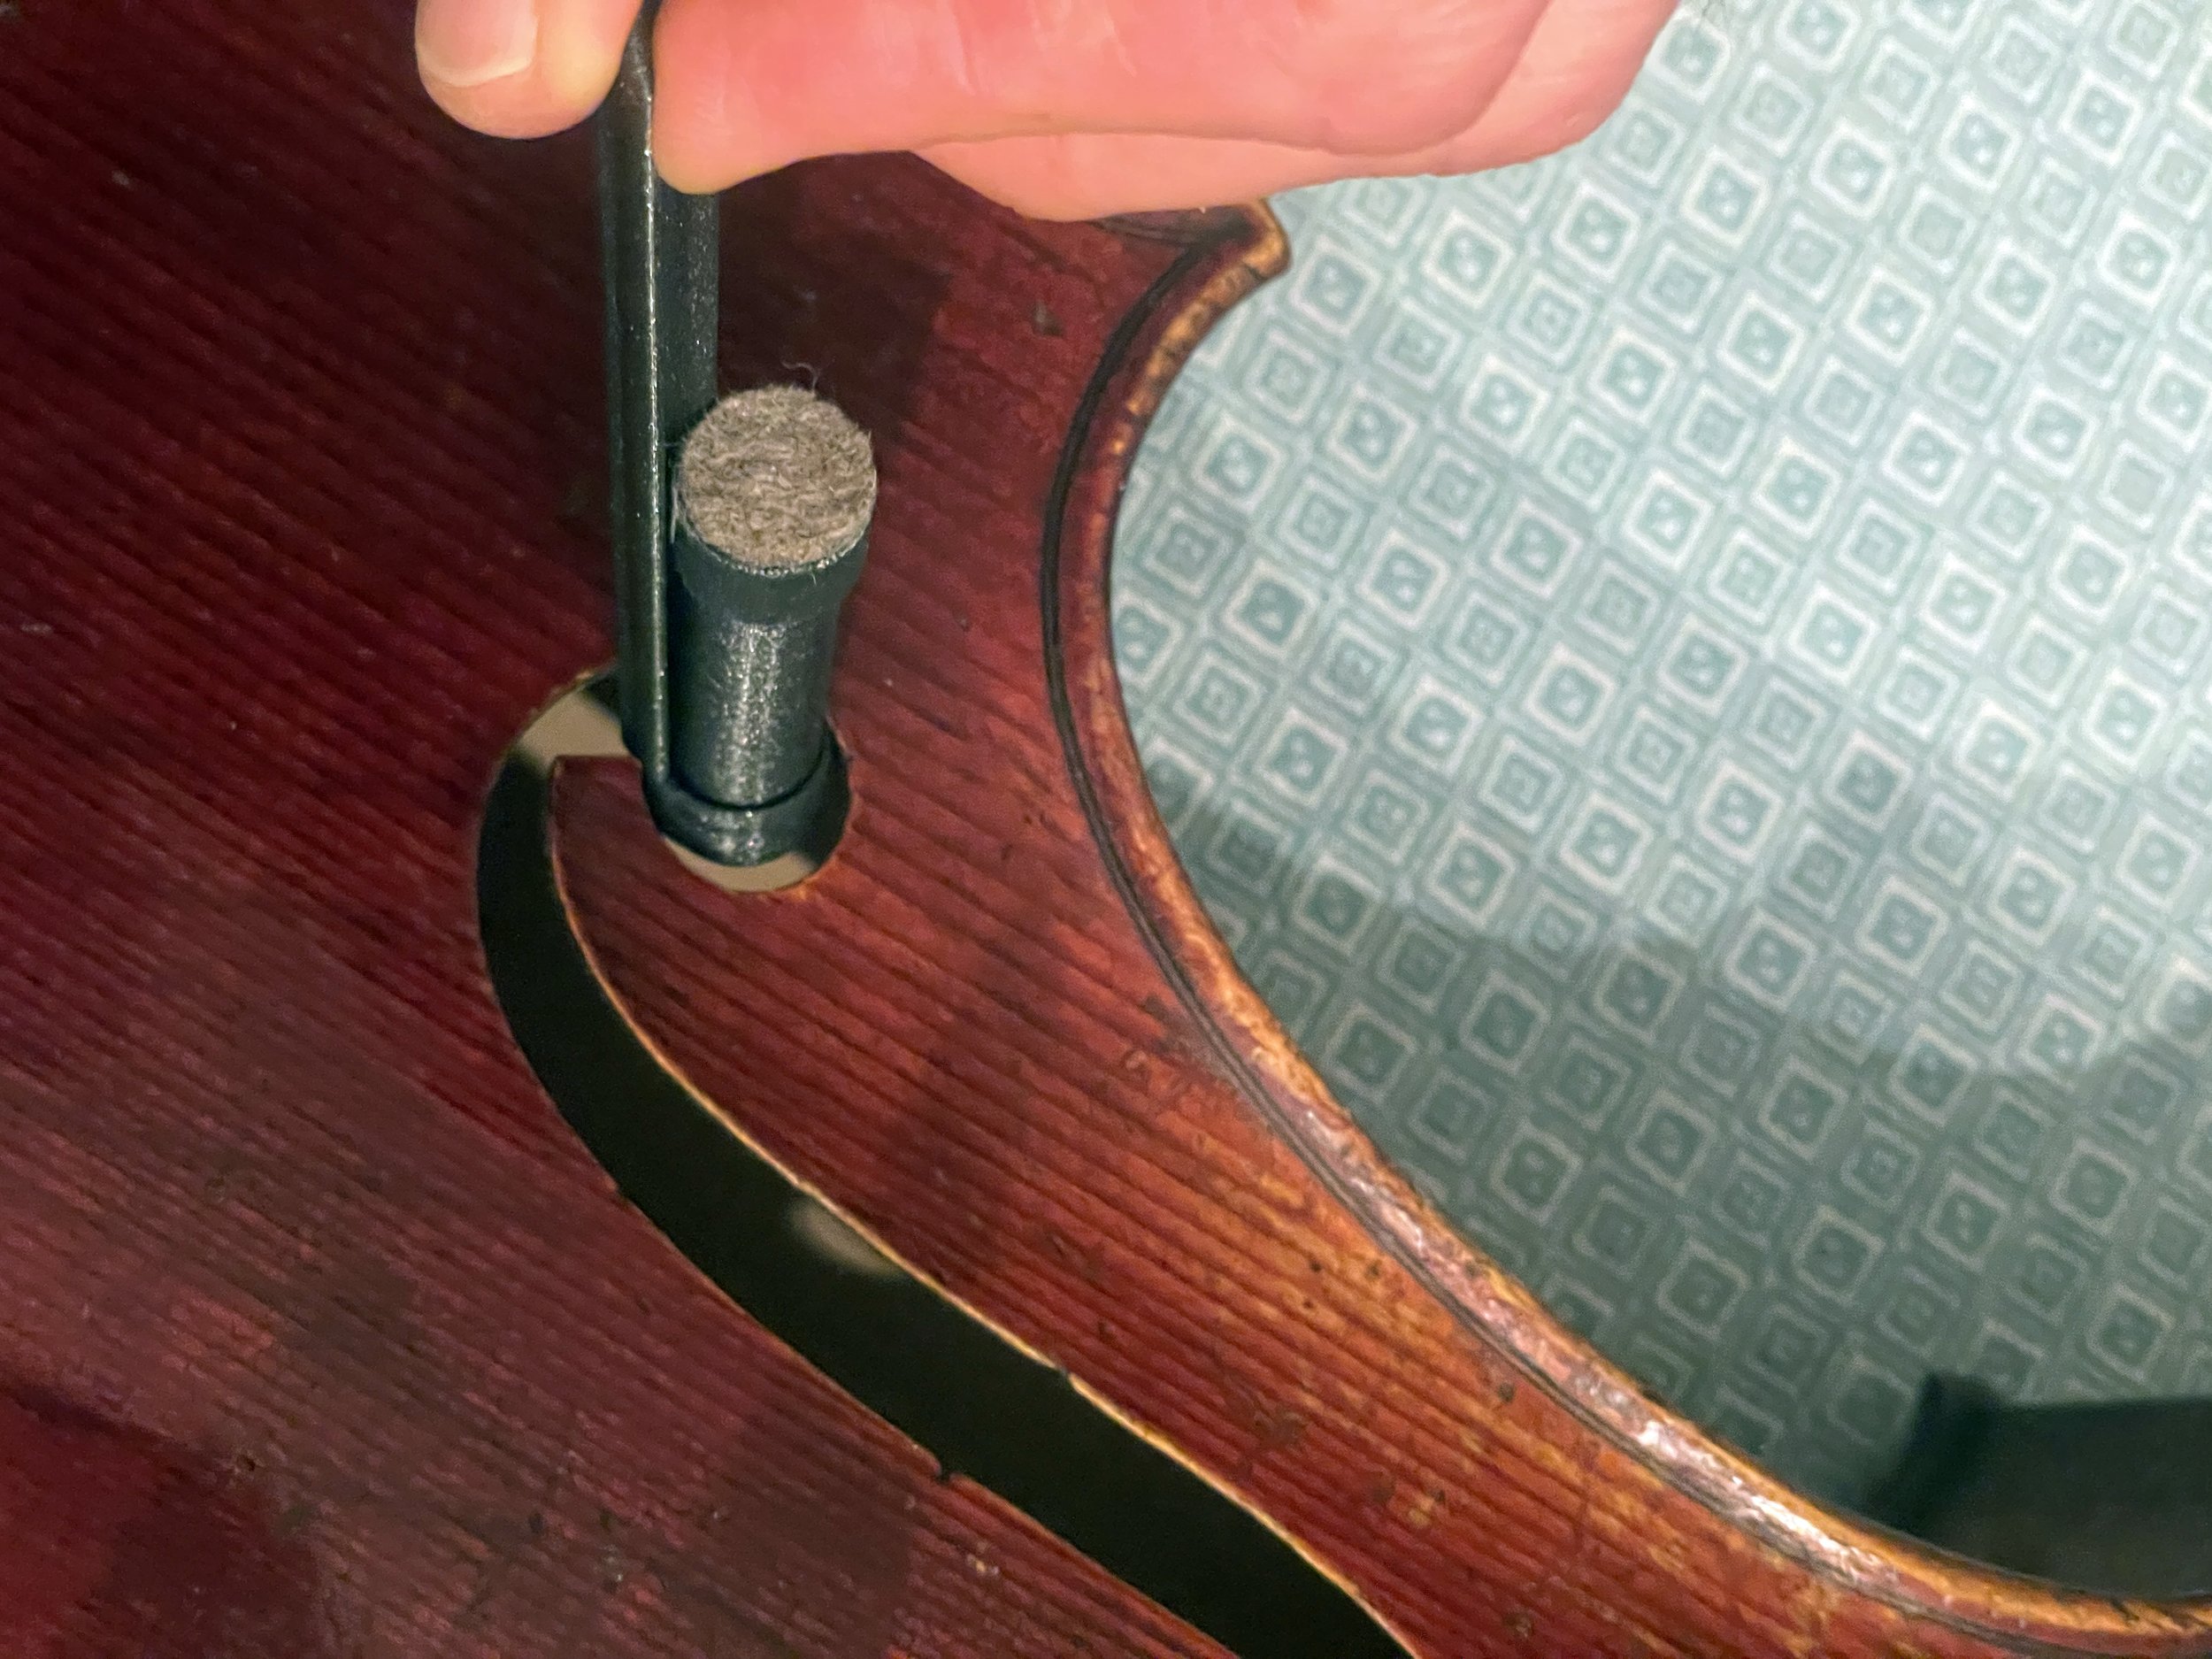
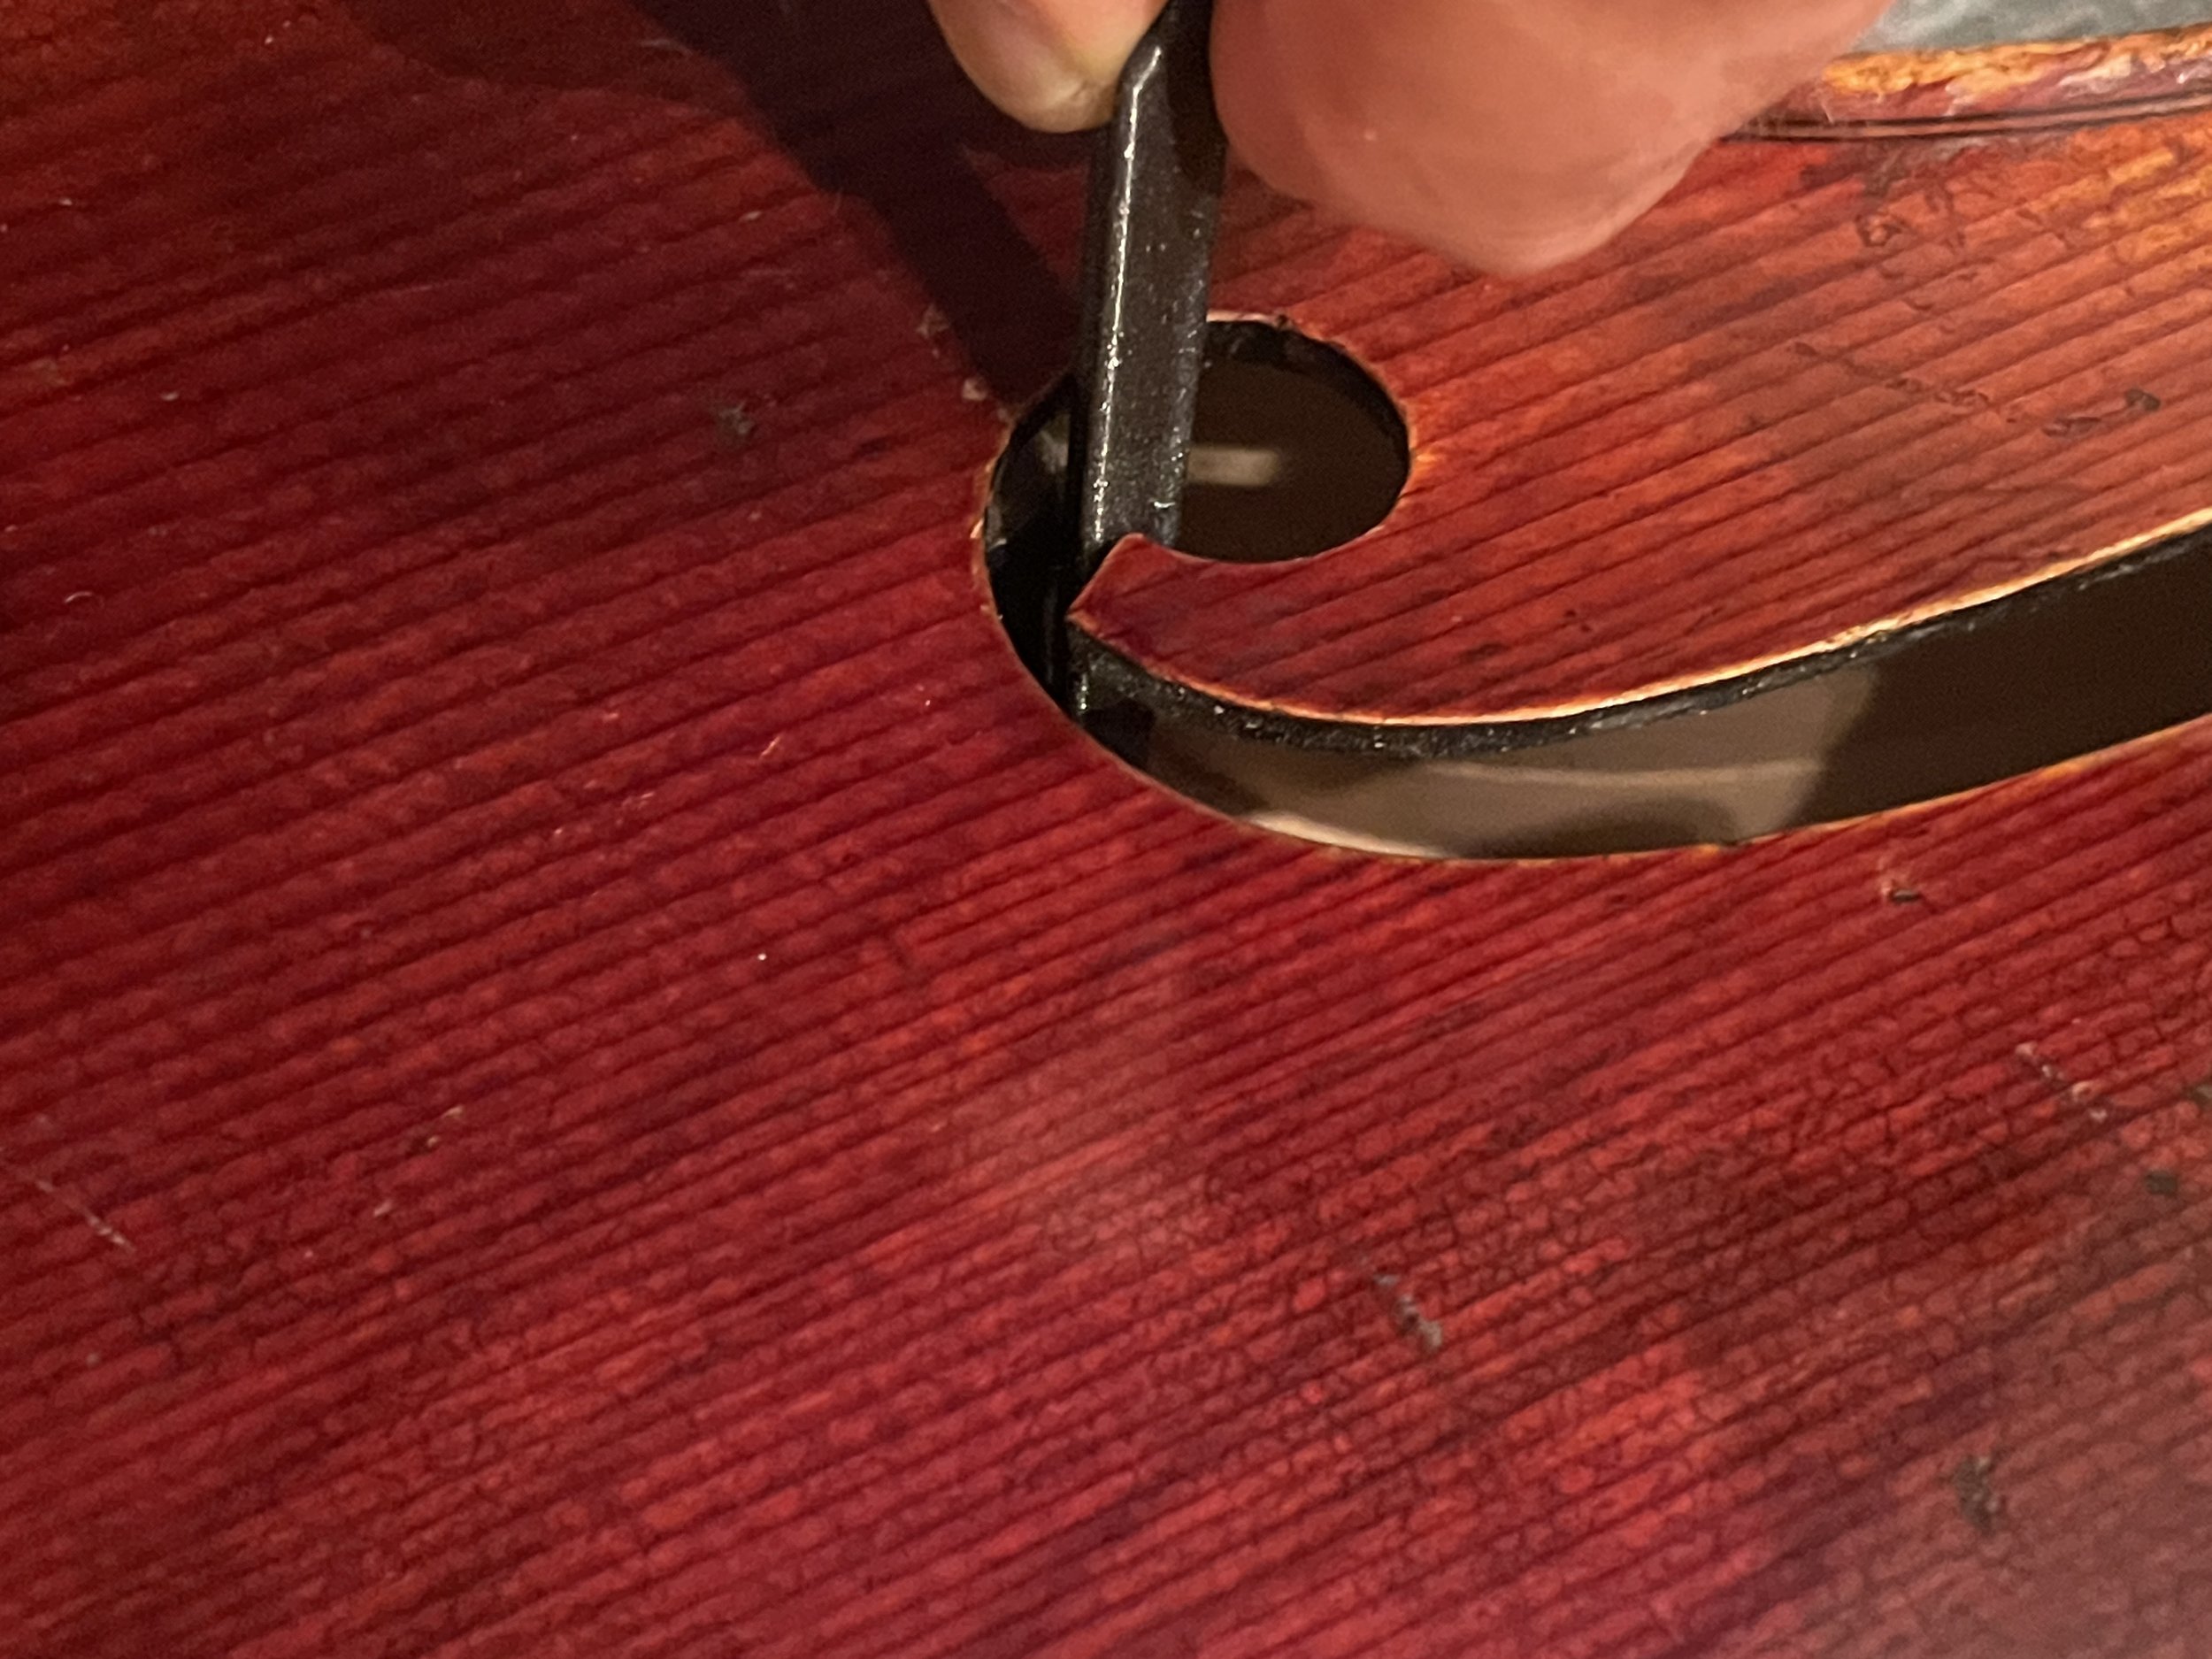
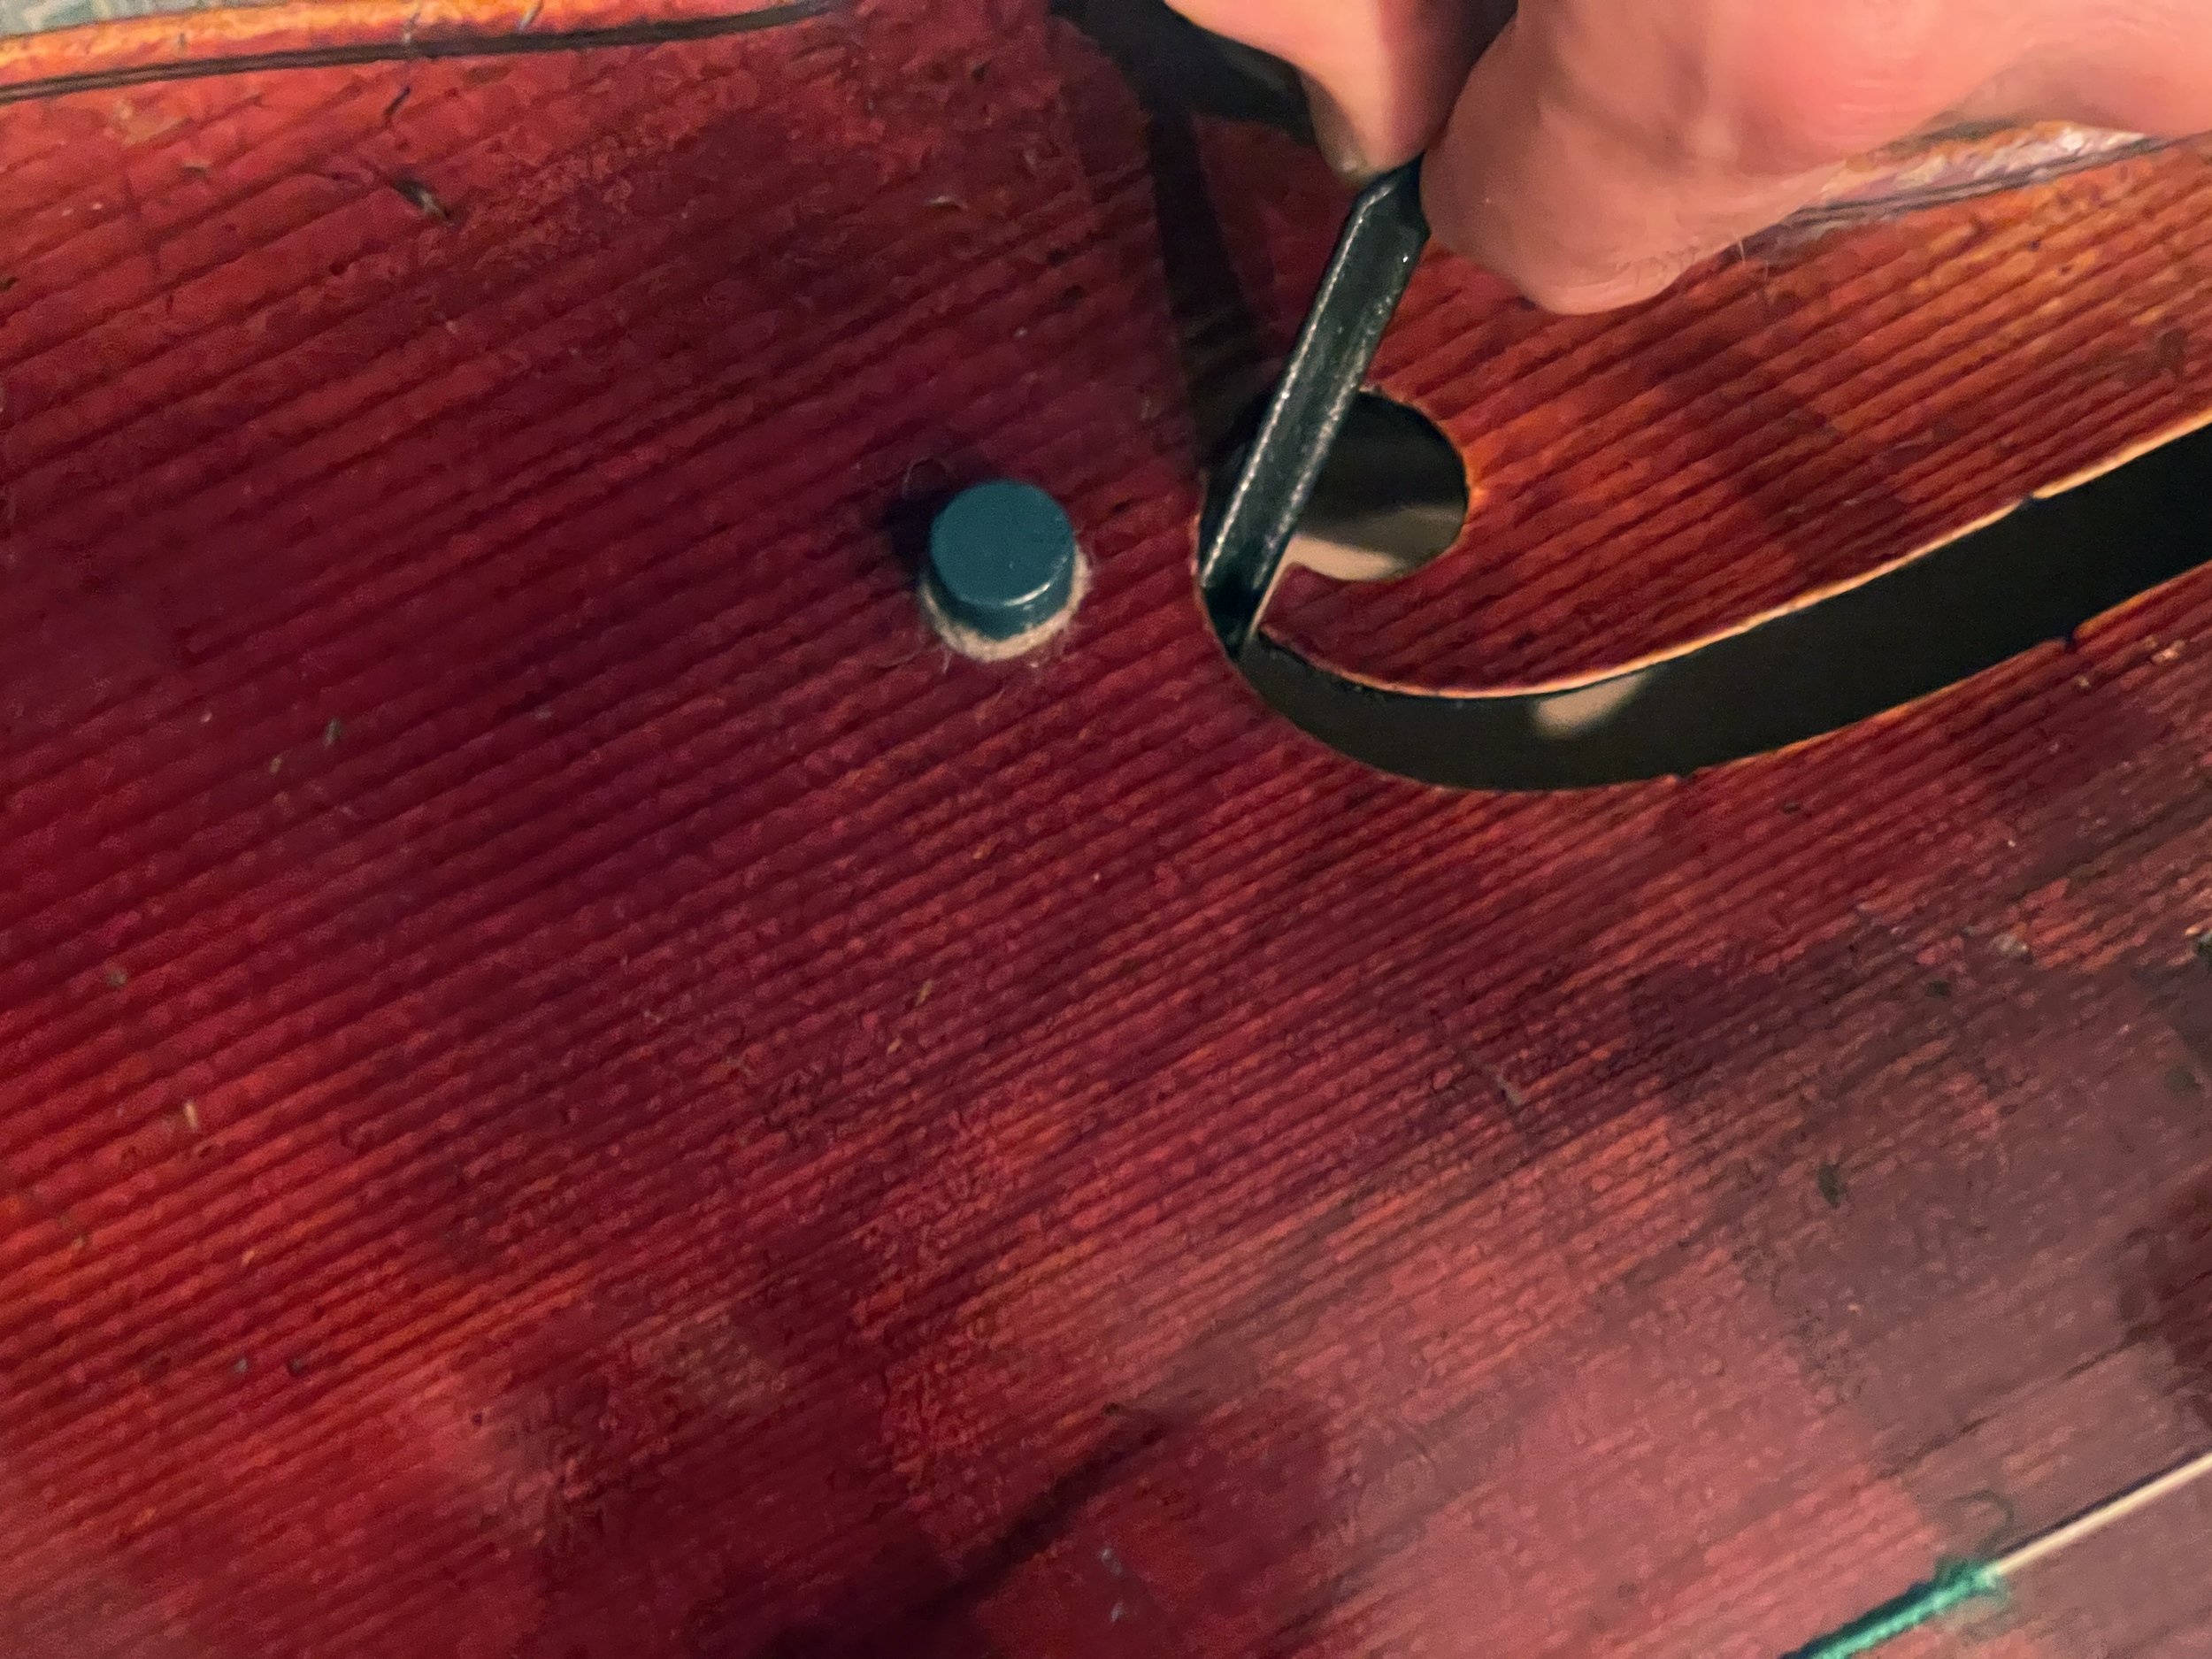
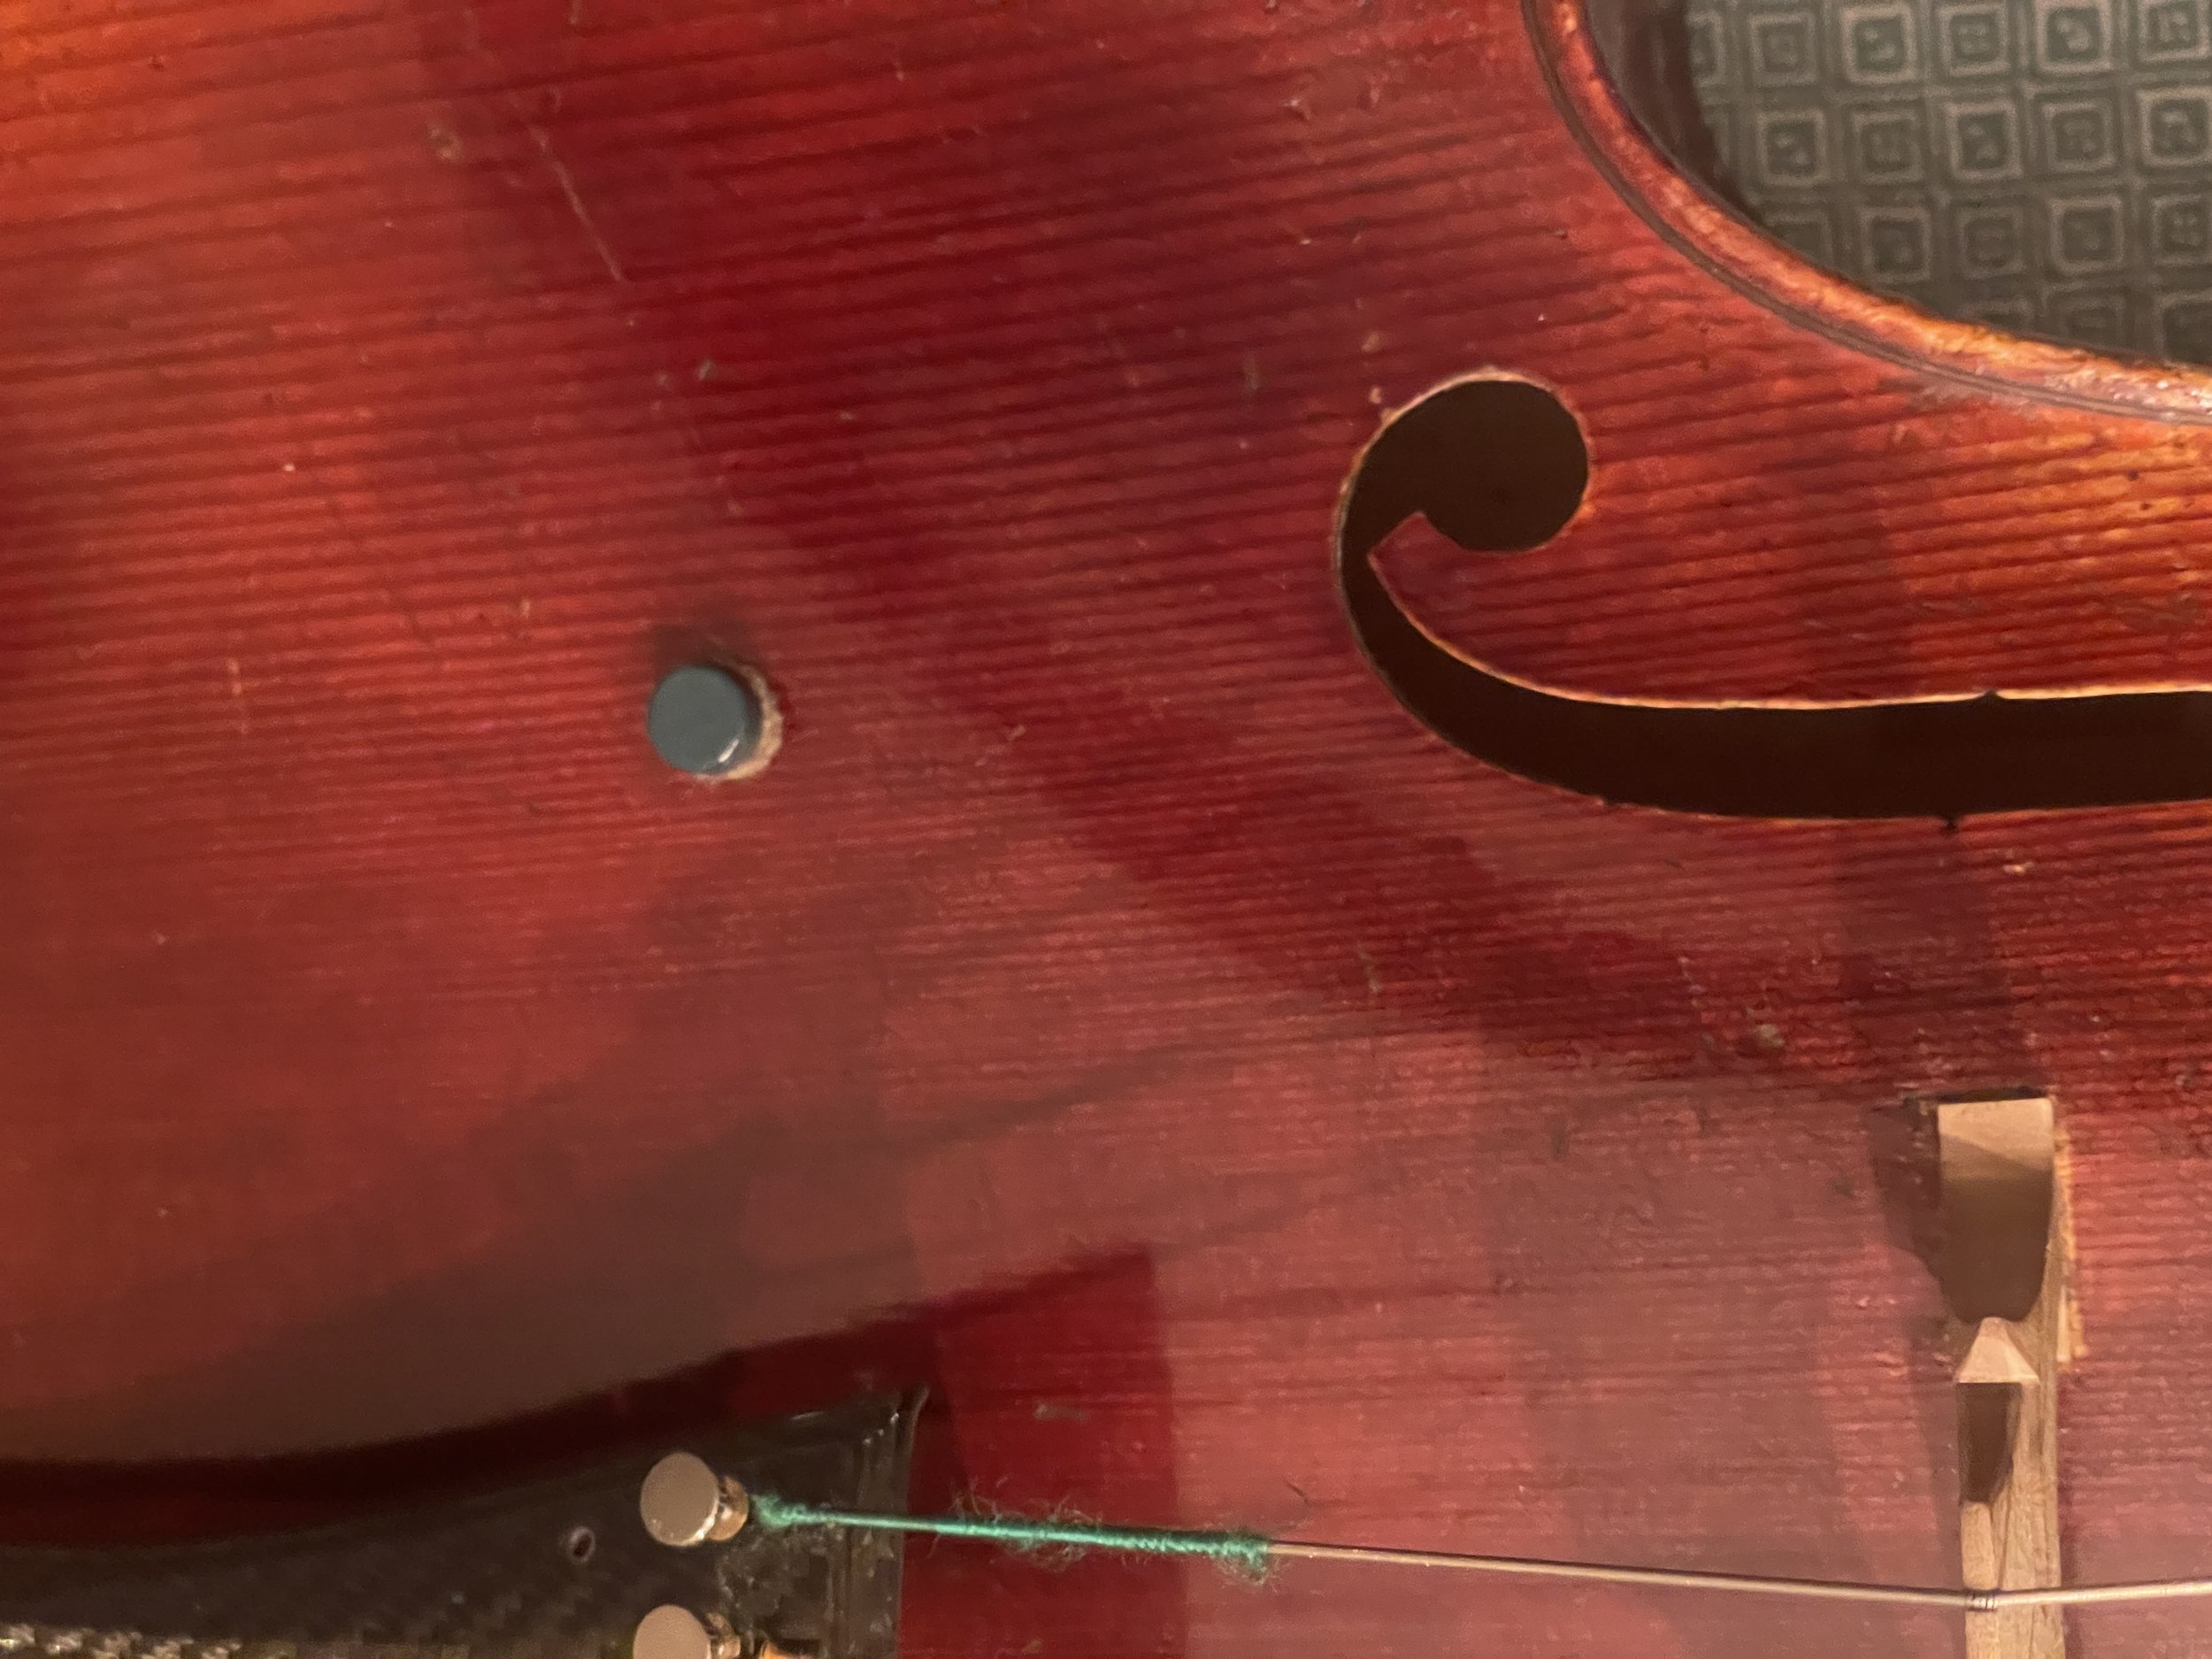
STEP 10: Insert the capped chamber into the safe installer and insert into the C-side f-hole. Observe the handle orientation in left photo above for greatest clearance. Once fully inserted, twist the handle as shown in the middle image above to position it so the external magnet can be attached. To attach the external magnet, place it felt side down on the body of the cello 12 inches away from the internal magnet assembly. Hold it firmly while sliding it into place against the internal magnet. With the assembly installed, reverse the twisting steps to remove the head of the installer from the cello.
STEP 11: Using a pen cap to remove the cap, try a variety of settings to see what works best! For color, Essie brand is a high-quality durable nail lacquer. Putting the magnet on the scissors tip helps to hold it for painting.
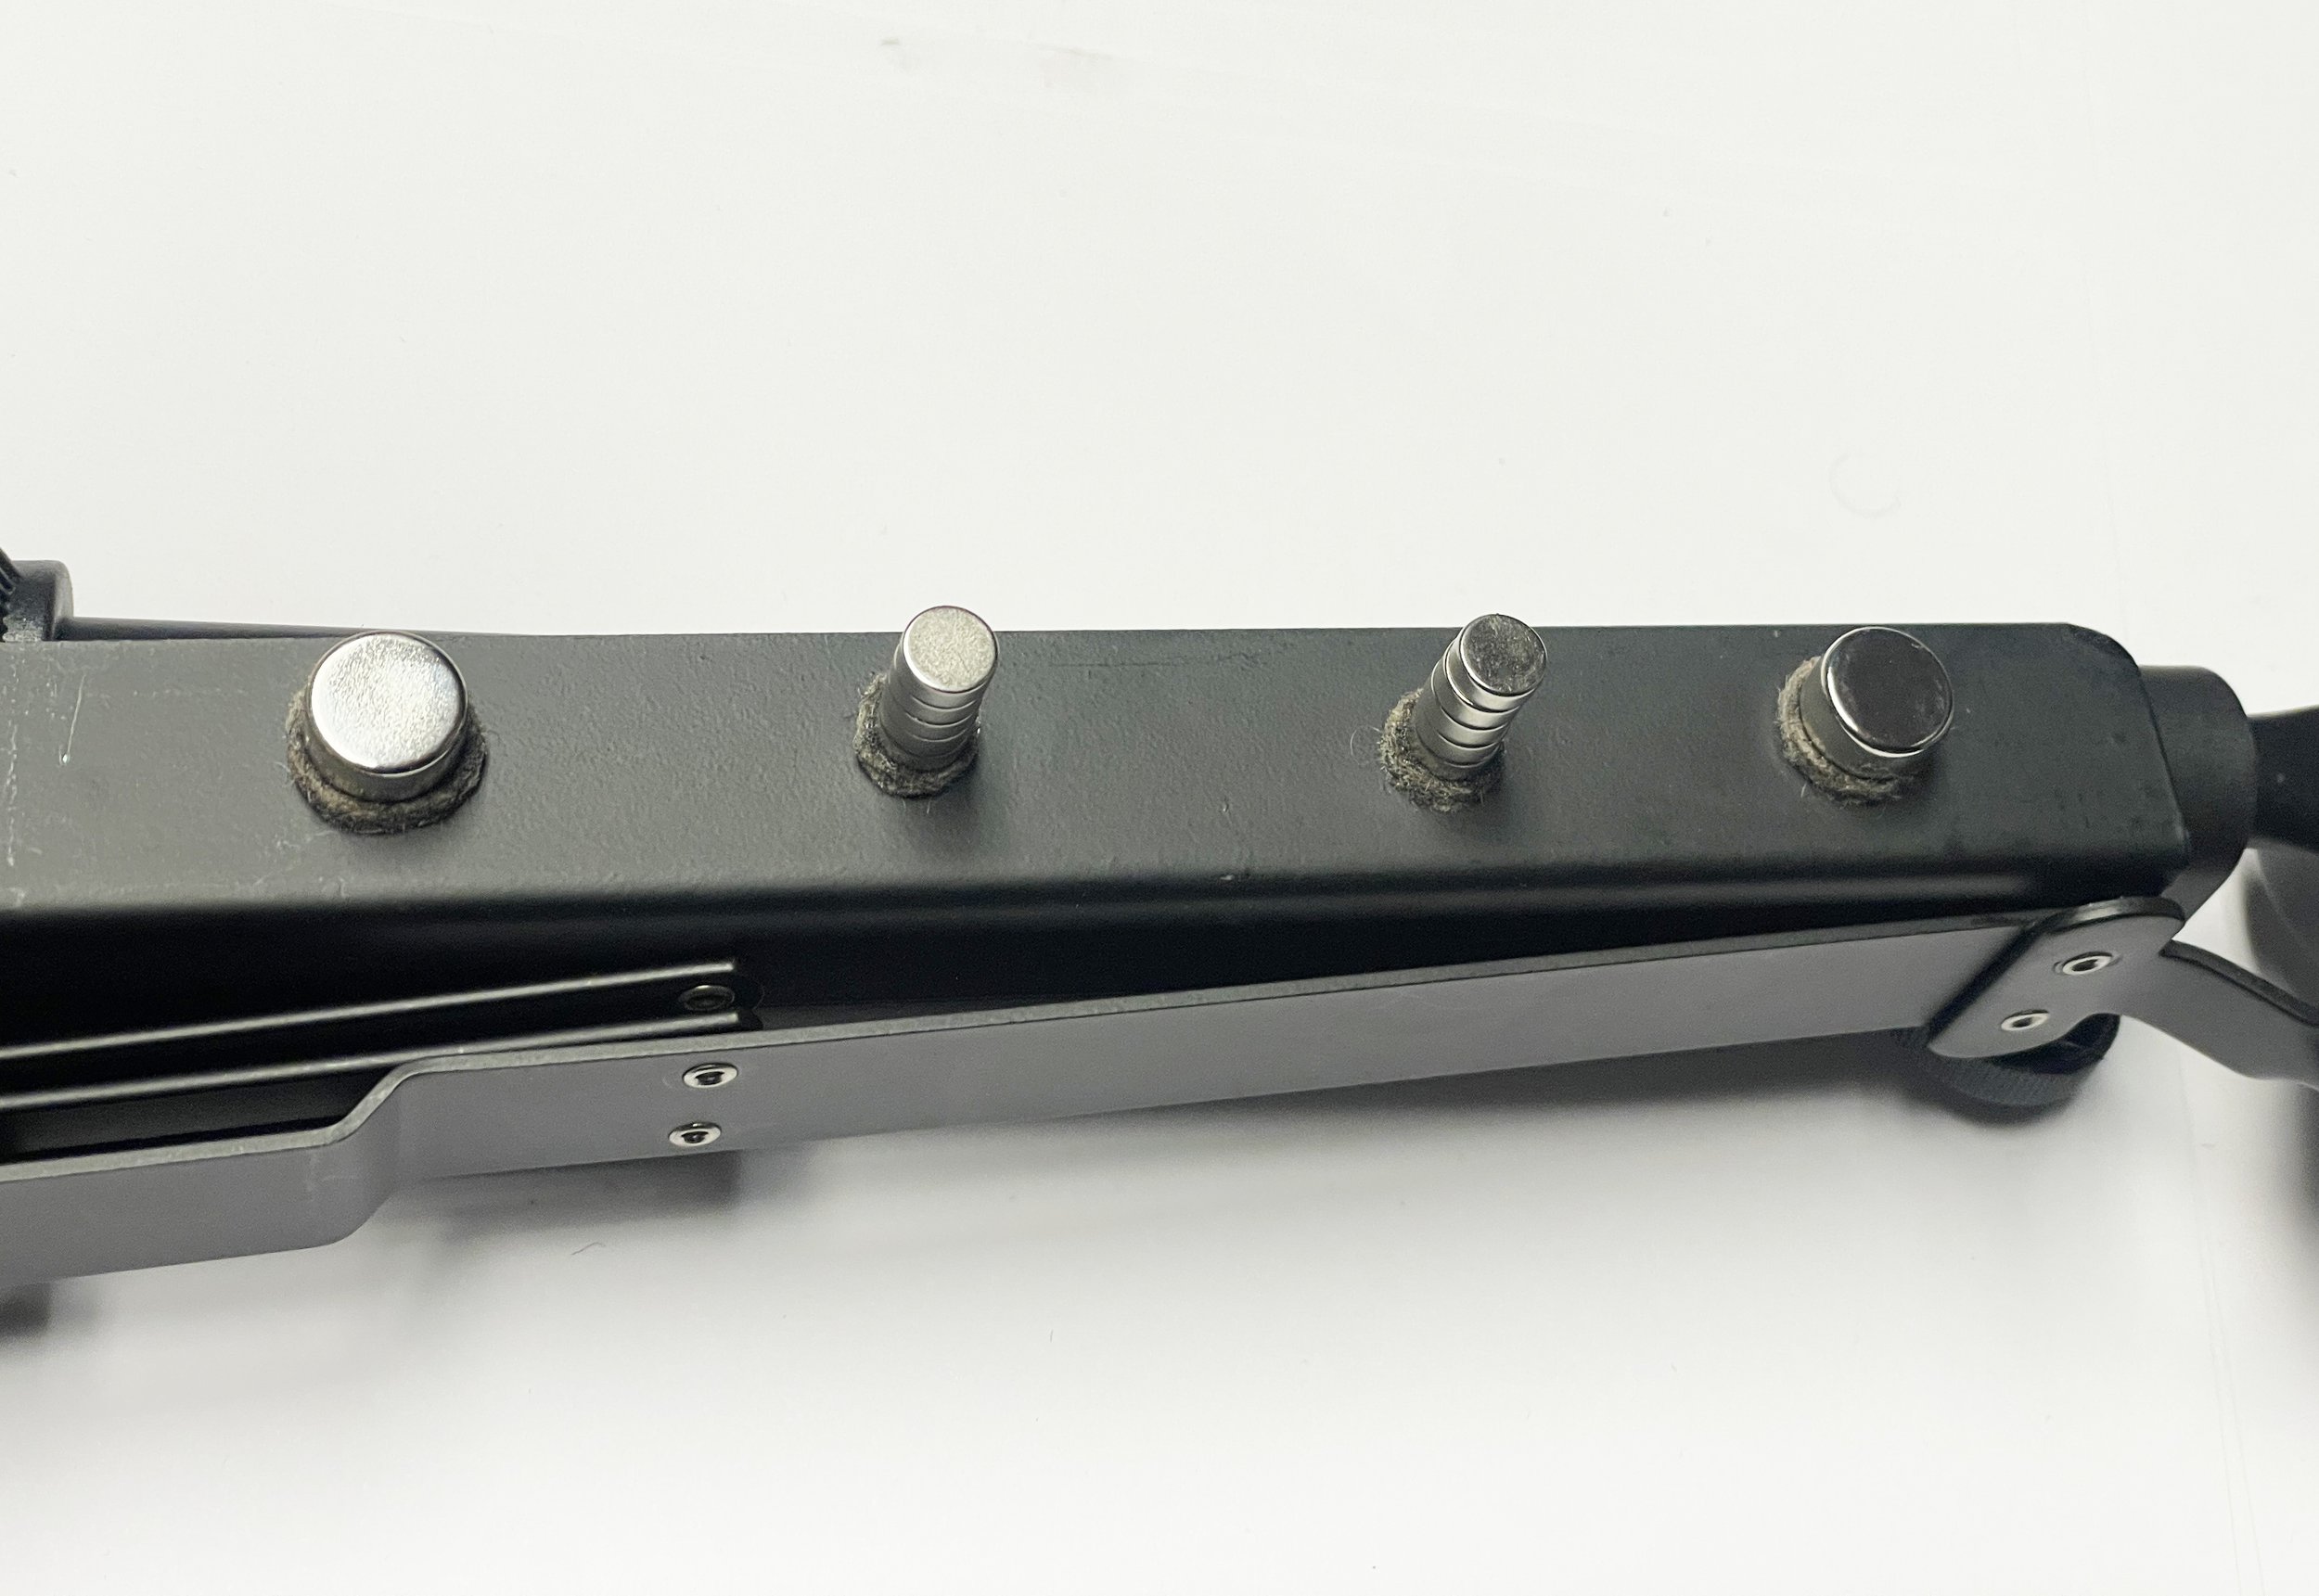
Don’t forget to try magnet combinations without the chamber -- Check out the “Stubby”, “Munchkin”, and “Tadpole” combinations below! (“Tadpole” with four 5/16th inch magnets is a favorite of my cello “Bruiser!”)

STEP 12: Engage (below left) or disengage the wolf rehabilitator (below right) as needed. Watch out for internal patches and the bass bar! If you accidentally drop the rehabilitator inside the cello, turn the cello upside down and place the external magnet felt-side on the inverted top near the rehabilitator. It will flip into place with the correct polarity. Moving closer to or farther from the bridge adjusts tone and response.
Advanced adjustment tips:
Some key variables that affect the functioning of a magnet wolf eliminator are its total mass, proportional mass between the various parts, how tightly it clamps onto the top of the cello, and how well the coupled oscillating action is matched to the frequency resonance being addressed. These variables interact in complex ways. How much force the magnets exert on the top of an instrument is a function of the size and quality of the magnets and the thickness and firmness of the felt. Thicker, firmer pads hold the magnets farther from each other, thereby lessening their grip on the top. Less grip can mute less, and neutralize wolf tones better, but too little grip can result in buzzing sounds on extremely wolfy notes. The 7/16th inch magnets with 1/8th inch thick F13 (Durometer 20A) pads are what we recommend for most cellos. In the unlikely event that you need even more extreme wolf control, we also have a resonating chambers that support a ½ inch diameter cap magnets (with the 3/4 inch thick option increasing the maximum pull rating of the magnet pair up to 32 pounds and matching the weight of a Krentz.) All the options use the same internal 5/16th inch piston magnets, one of which can be attached to the underside of the chamber cap magnet to increase its pulling force by several pounds.
To test if you have the best magnet combination for your cello, try the following “extreme wolf pizzicato shock test.” To do this, put the wolf eliminator wherever you think the wolf action is most extreme, most likely 2 to 3 inches below the C bout f-hole. Pluck the wolf note as loudly as possible with an explosive pizzicato. If the external magnet hops around or makes buzzing sounds you need heavier magnets, thinner felt, or both. If the cello sounds muted, you need lighter magnets or a different magnet combination. Faced with extreme wolf tones, even massive magnet combos like the 35 grams Krentz Modulator will often buzz a little when subjected to this test. It isn’t usually a problem because you are unlikely to encounter these conditions when playing repertoire. Still, it’s a good idea to test your magnet setup under extreme conditions before taking it “on the road” in live concerts. Ultimately, the best position for the resonator is usually at the edge of the nodal activity where the resonator can hold the wolf in check, but isn’t so close to the node as to be subjected to these extreme oscillations.
If you have questions, please contact us!
https://www.saddleridermusic.com/contact
By subscribing to the Saddle Rider Blog at
https://www.saddleridermusic.com/saddle-rider-blog
and purchasing the great sounding and innovative products we sell, you help support our work with free products and open-source designs like this one. Stay tuned for exciting new 3D printable bridge templates made from Carbon Fiber PLA and more! If you haven’t listened to our 3D printed composite bridges, please check out last month’s blog post!
As always, Thank you for your support! The Saddle Rider Research Collective